Ad-viewing analysis settings
What it does
- Designate where ads are placed and where they’re viewed from on the 2D map.
- Ad-viewing analysis runs based on those designated zones.
User tool — shelf level configuration
1. Open the line/zone drawing screen
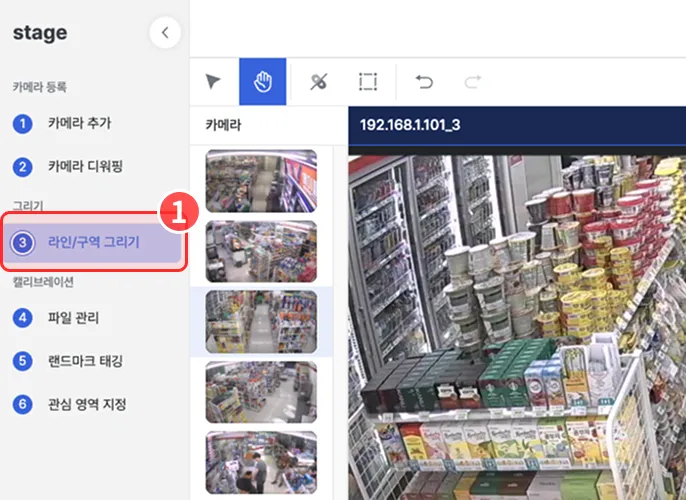
In the left menu, click the Line/zone drawing button to open the line/zone drawing screen.
2. Pick the ad-viewing analysis point
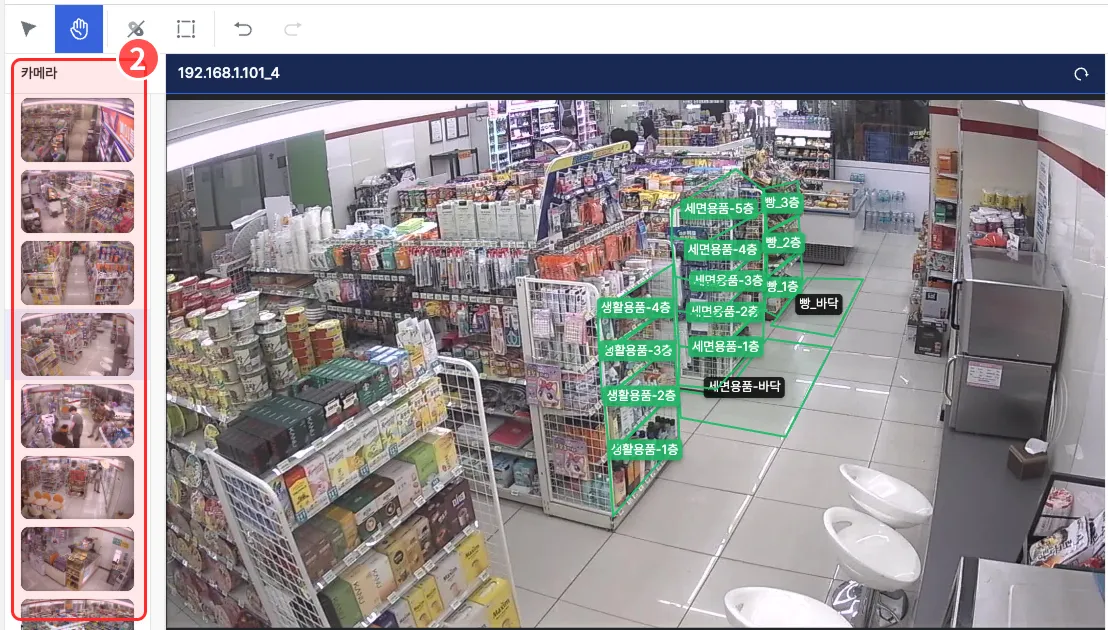
In the camera views on the left of the screen, click the camera view that captures the ad you want to analyze.
3. Draw the ad placement (Attention Target — AT)
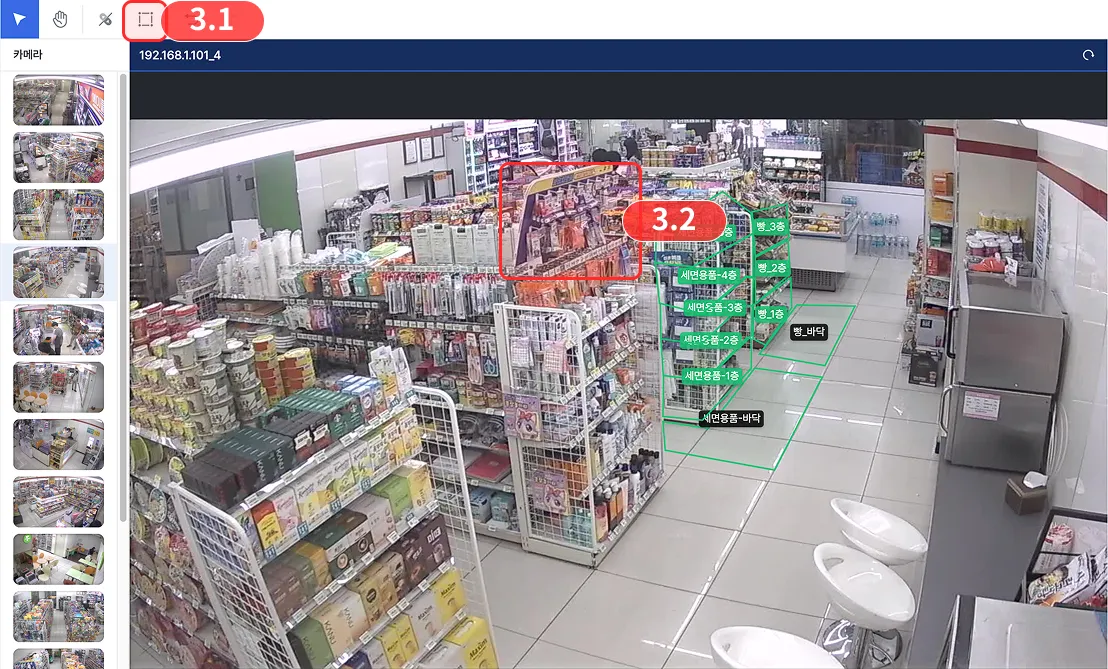
- Click the zone tool in the top toolbar to draw a zone wherever you want.
- Place several points along the ad shape to form a polygon.
- Right-click or press Enter to finish.
4. Confirm the ad analysis point
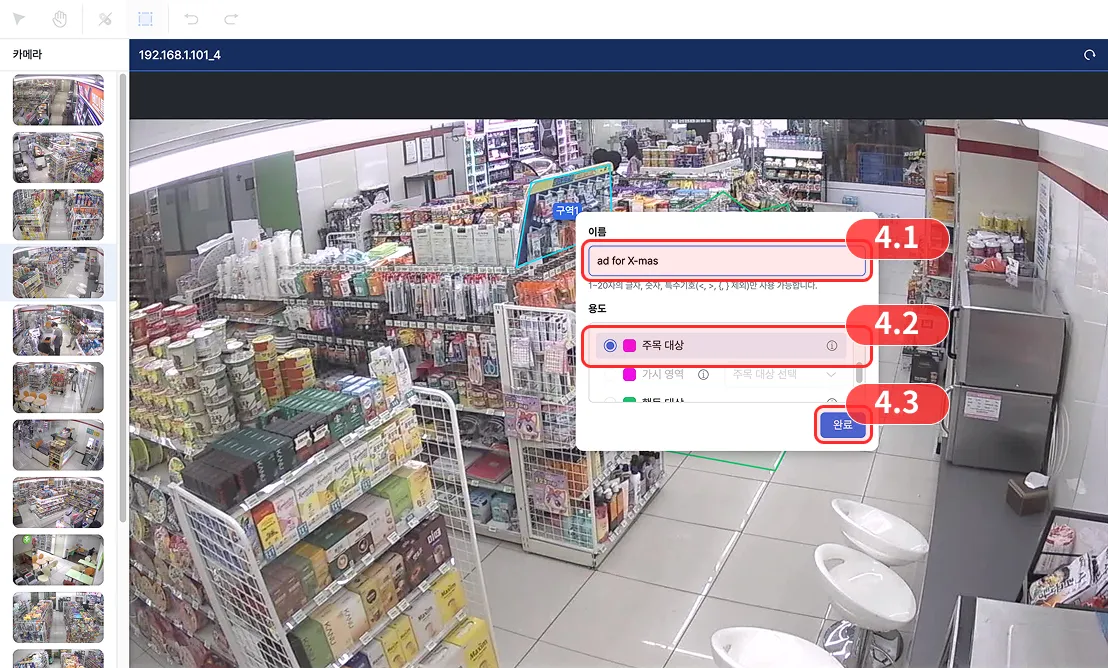
- Set the zone name. (e.g.,
ad for X-mas) - Set the zone purpose to
Attention Target (AT). - Click the Confirm button to lock in the analysis point.
5. Draw the floor area where the ad is visible (Visible Area — VA)
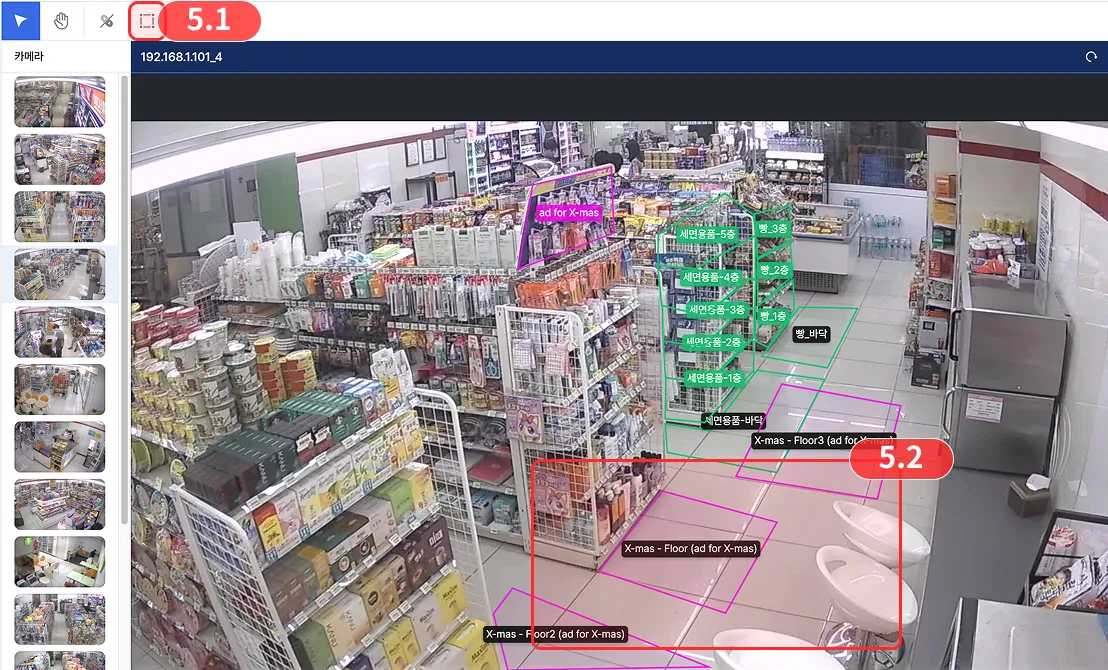
- Click the zone tool in the top toolbar.
- Draw a polygon by placing several points on the floor area where customers can view the ad.
- Right-click or press Enter to finish.
6. Confirm the visible area
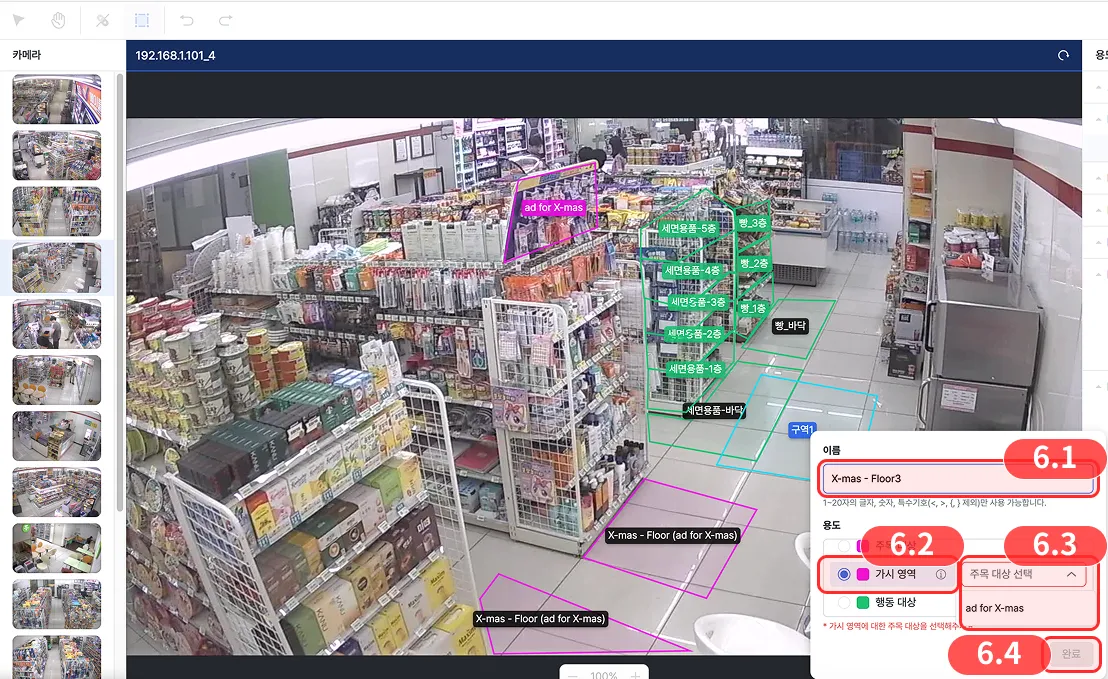
- Set the zone name. (e.g.,
X-mas - Floor3) - Set the zone purpose to
Visible Area (VA). - Select every ad visible from this floor area.
- Click the Confirm button to lock in the analysis point.