Event schedule management
What it does
- View information for each event period in a report.
- Select two events at the same time to compare engagement and impact across them.
1. Open the event schedule management screen

Click the Settings button at the bottom-left of the screen to open the Settings page.
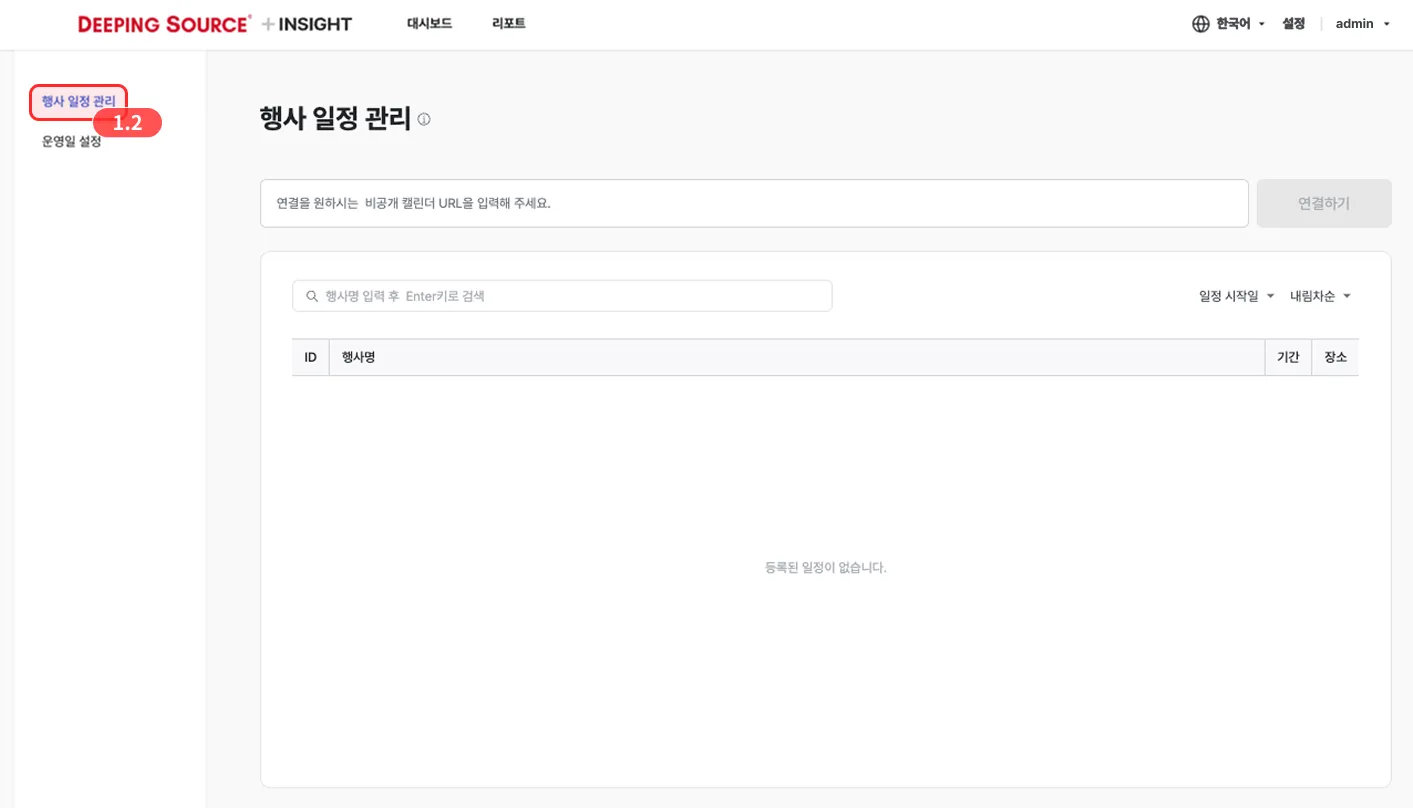
In the left menu of the Settings page, click the Event schedule management button.
2. Copy the calendar address from Google Calendar
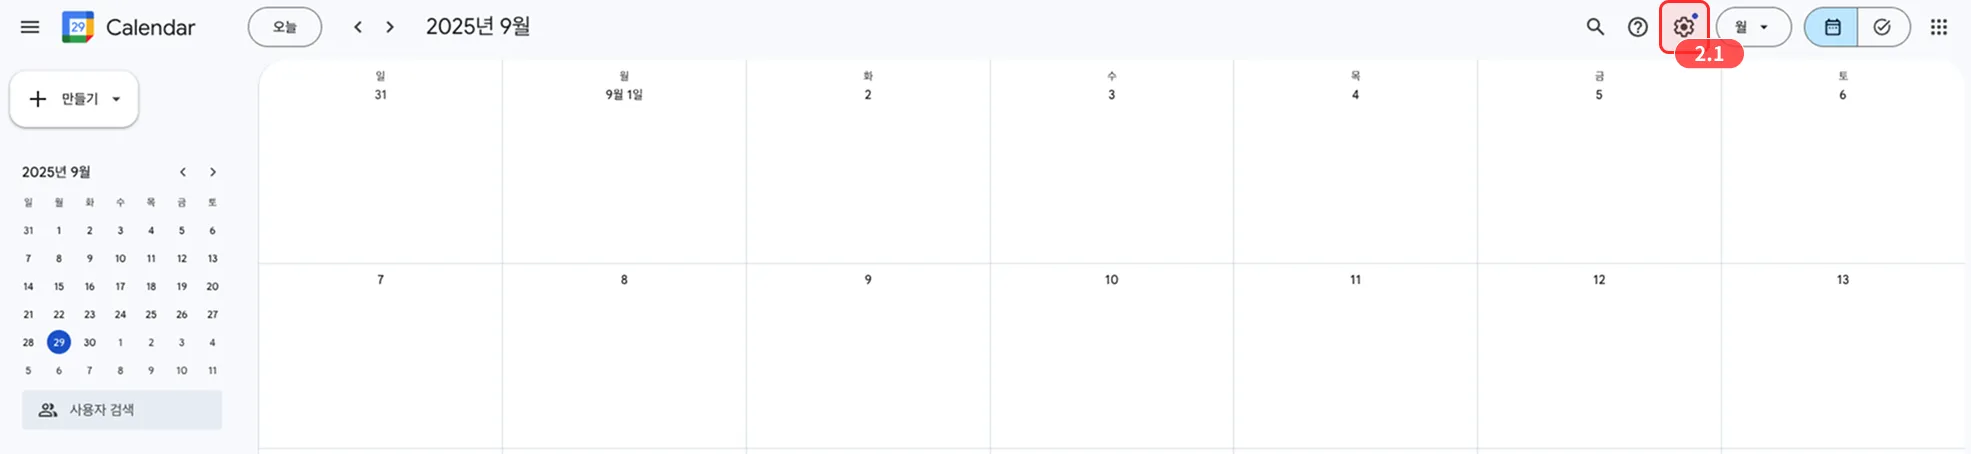
In Google Calendar — where you’ll create the event schedule — click the ⚙️ Settings button at the top-right.
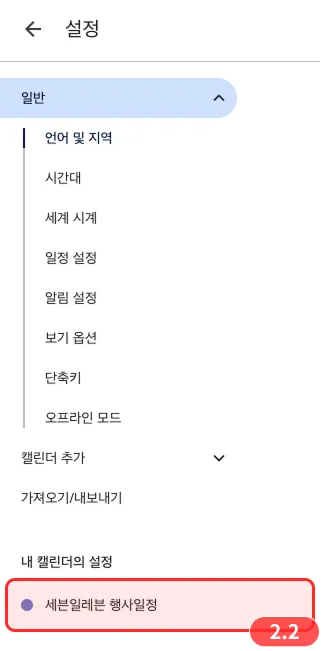
In the left menu of the Settings screen, pick the calendar where event schedules are stored.
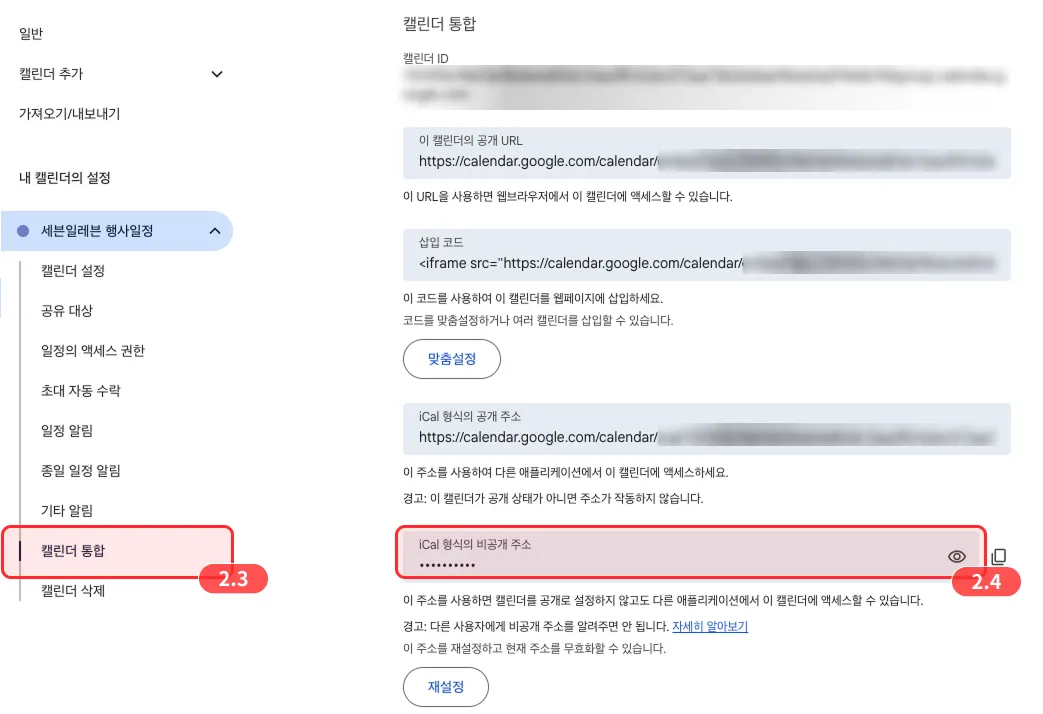
- Open the Integrate calendar menu inside the selected calendar.
- Copy the iCal-format private address from the Integrate calendar menu.
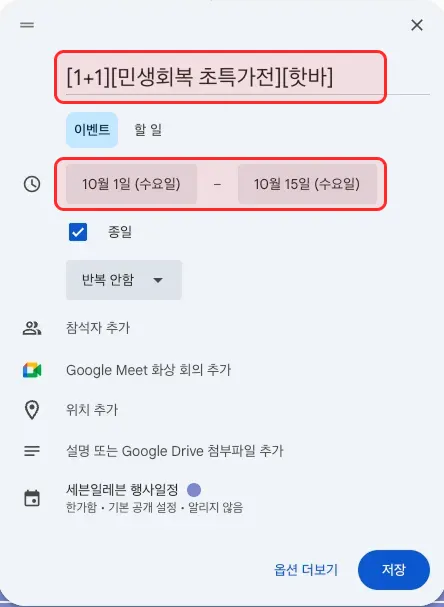
Is there a registration template for events?
There is no fixed template. You can freely fill in the title and period.
- Title: write so the event content is recognizable at a glance.
- Period: set to match the event schedule.
3. Paste the calendar address into StoreInsight
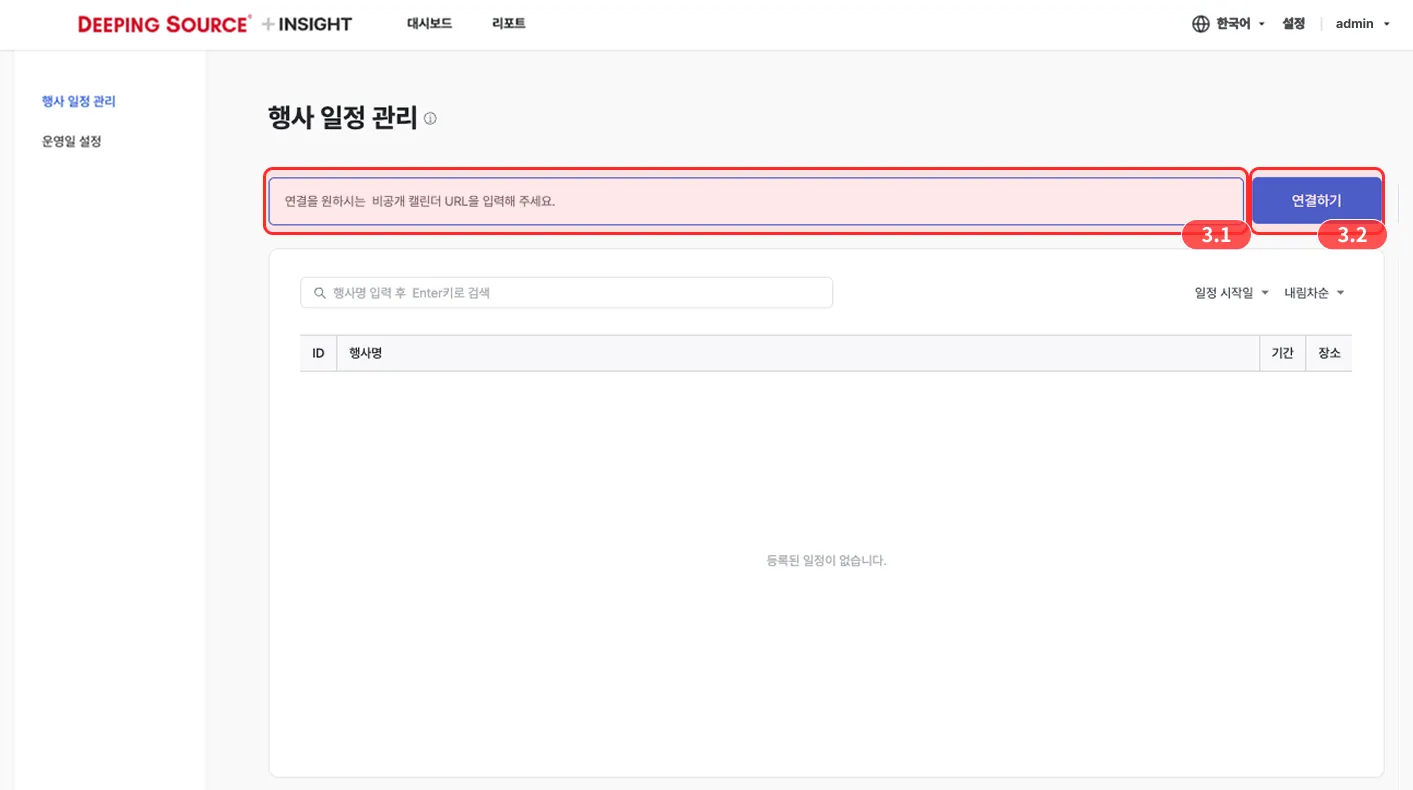
- On the event schedule management screen, paste the iCal-format private address URL you copied.
- Click the Connect button.