

Register Cameras
Once the stream network is connected, find the store’s cameras from the On-Site Control Panel and register them with StoreInsight on the spot. You don’t need the camera addresses in advance, and no separate configuration tool is required.
Finding cameras
- On the Status tab, press the Cameras card to open the Camera view area.
- Press the Manage cameras button to open the Discovered devices window.
- Press the Find cameras button to bring up the Camera login window.
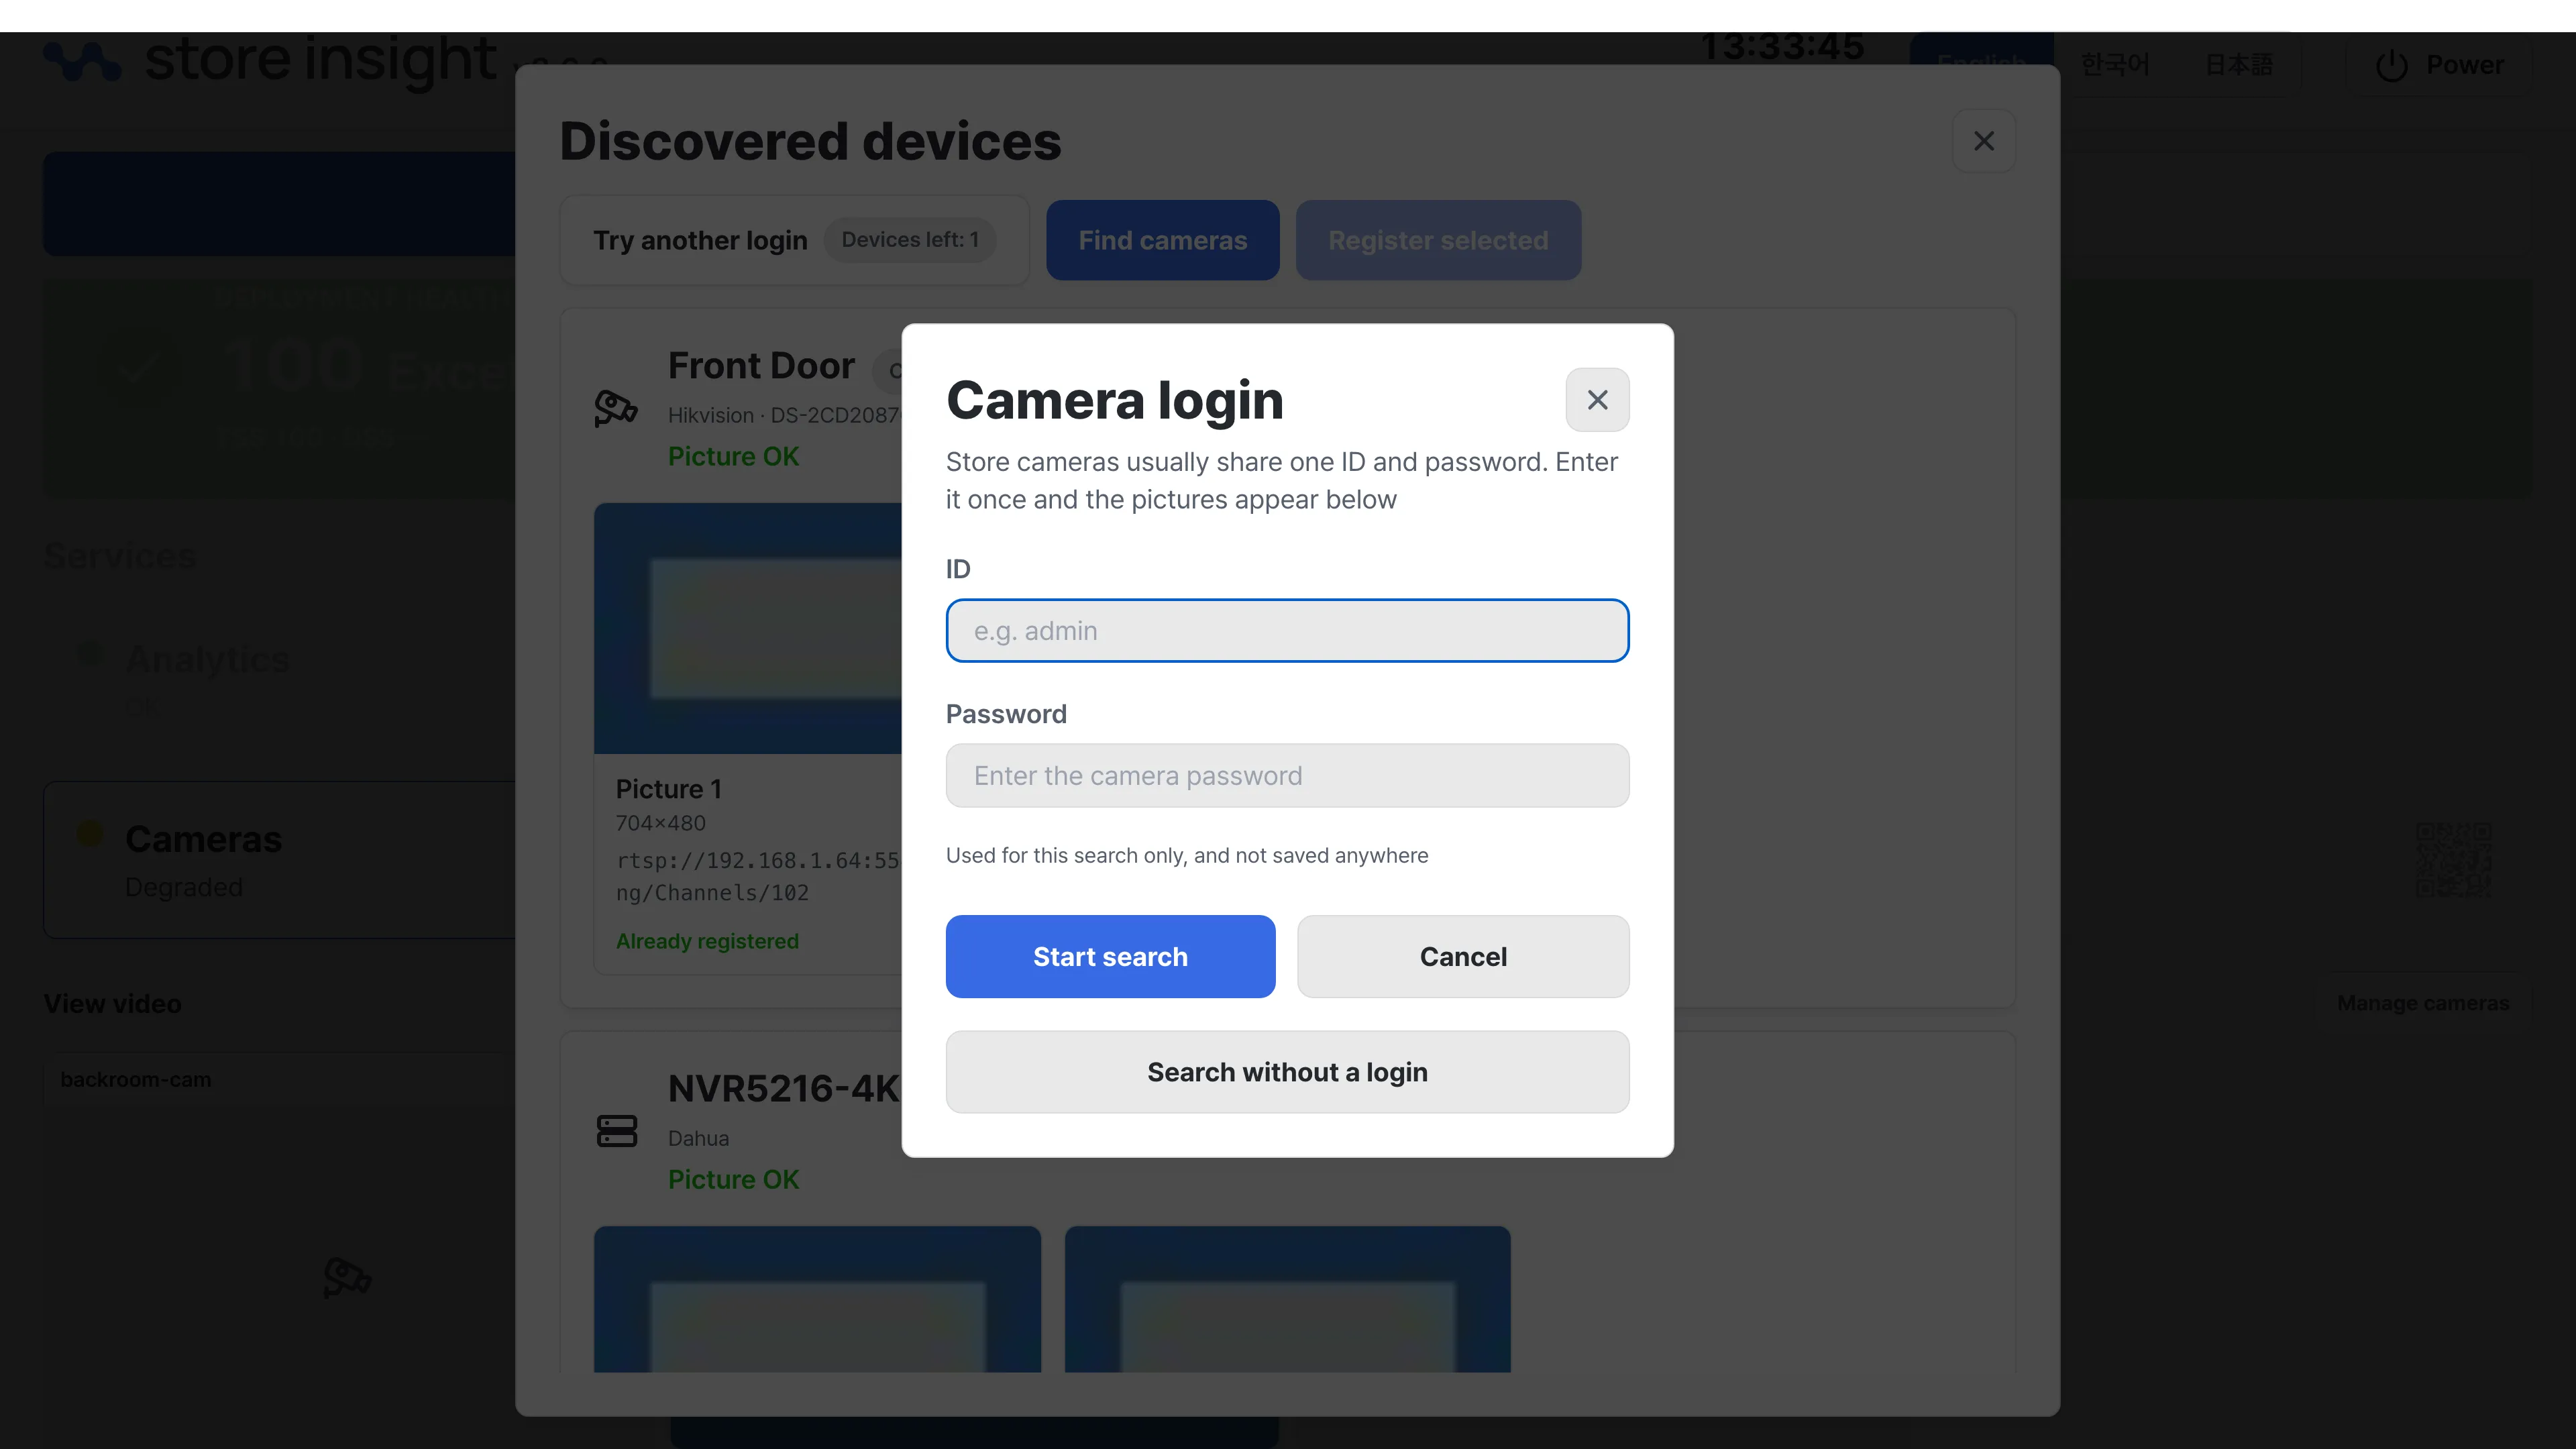
Store cameras usually share the same ID and password. Enter it once and the panel pulls the discovered devices’ video and shows it. The credentials you enter are used only for this search and are never stored anywhere.
Registering cameras
As the search runs, devices whose video was pulled appear in the list first. Cross-check them against the RTSP addresses in the site information to confirm which cameras to register.
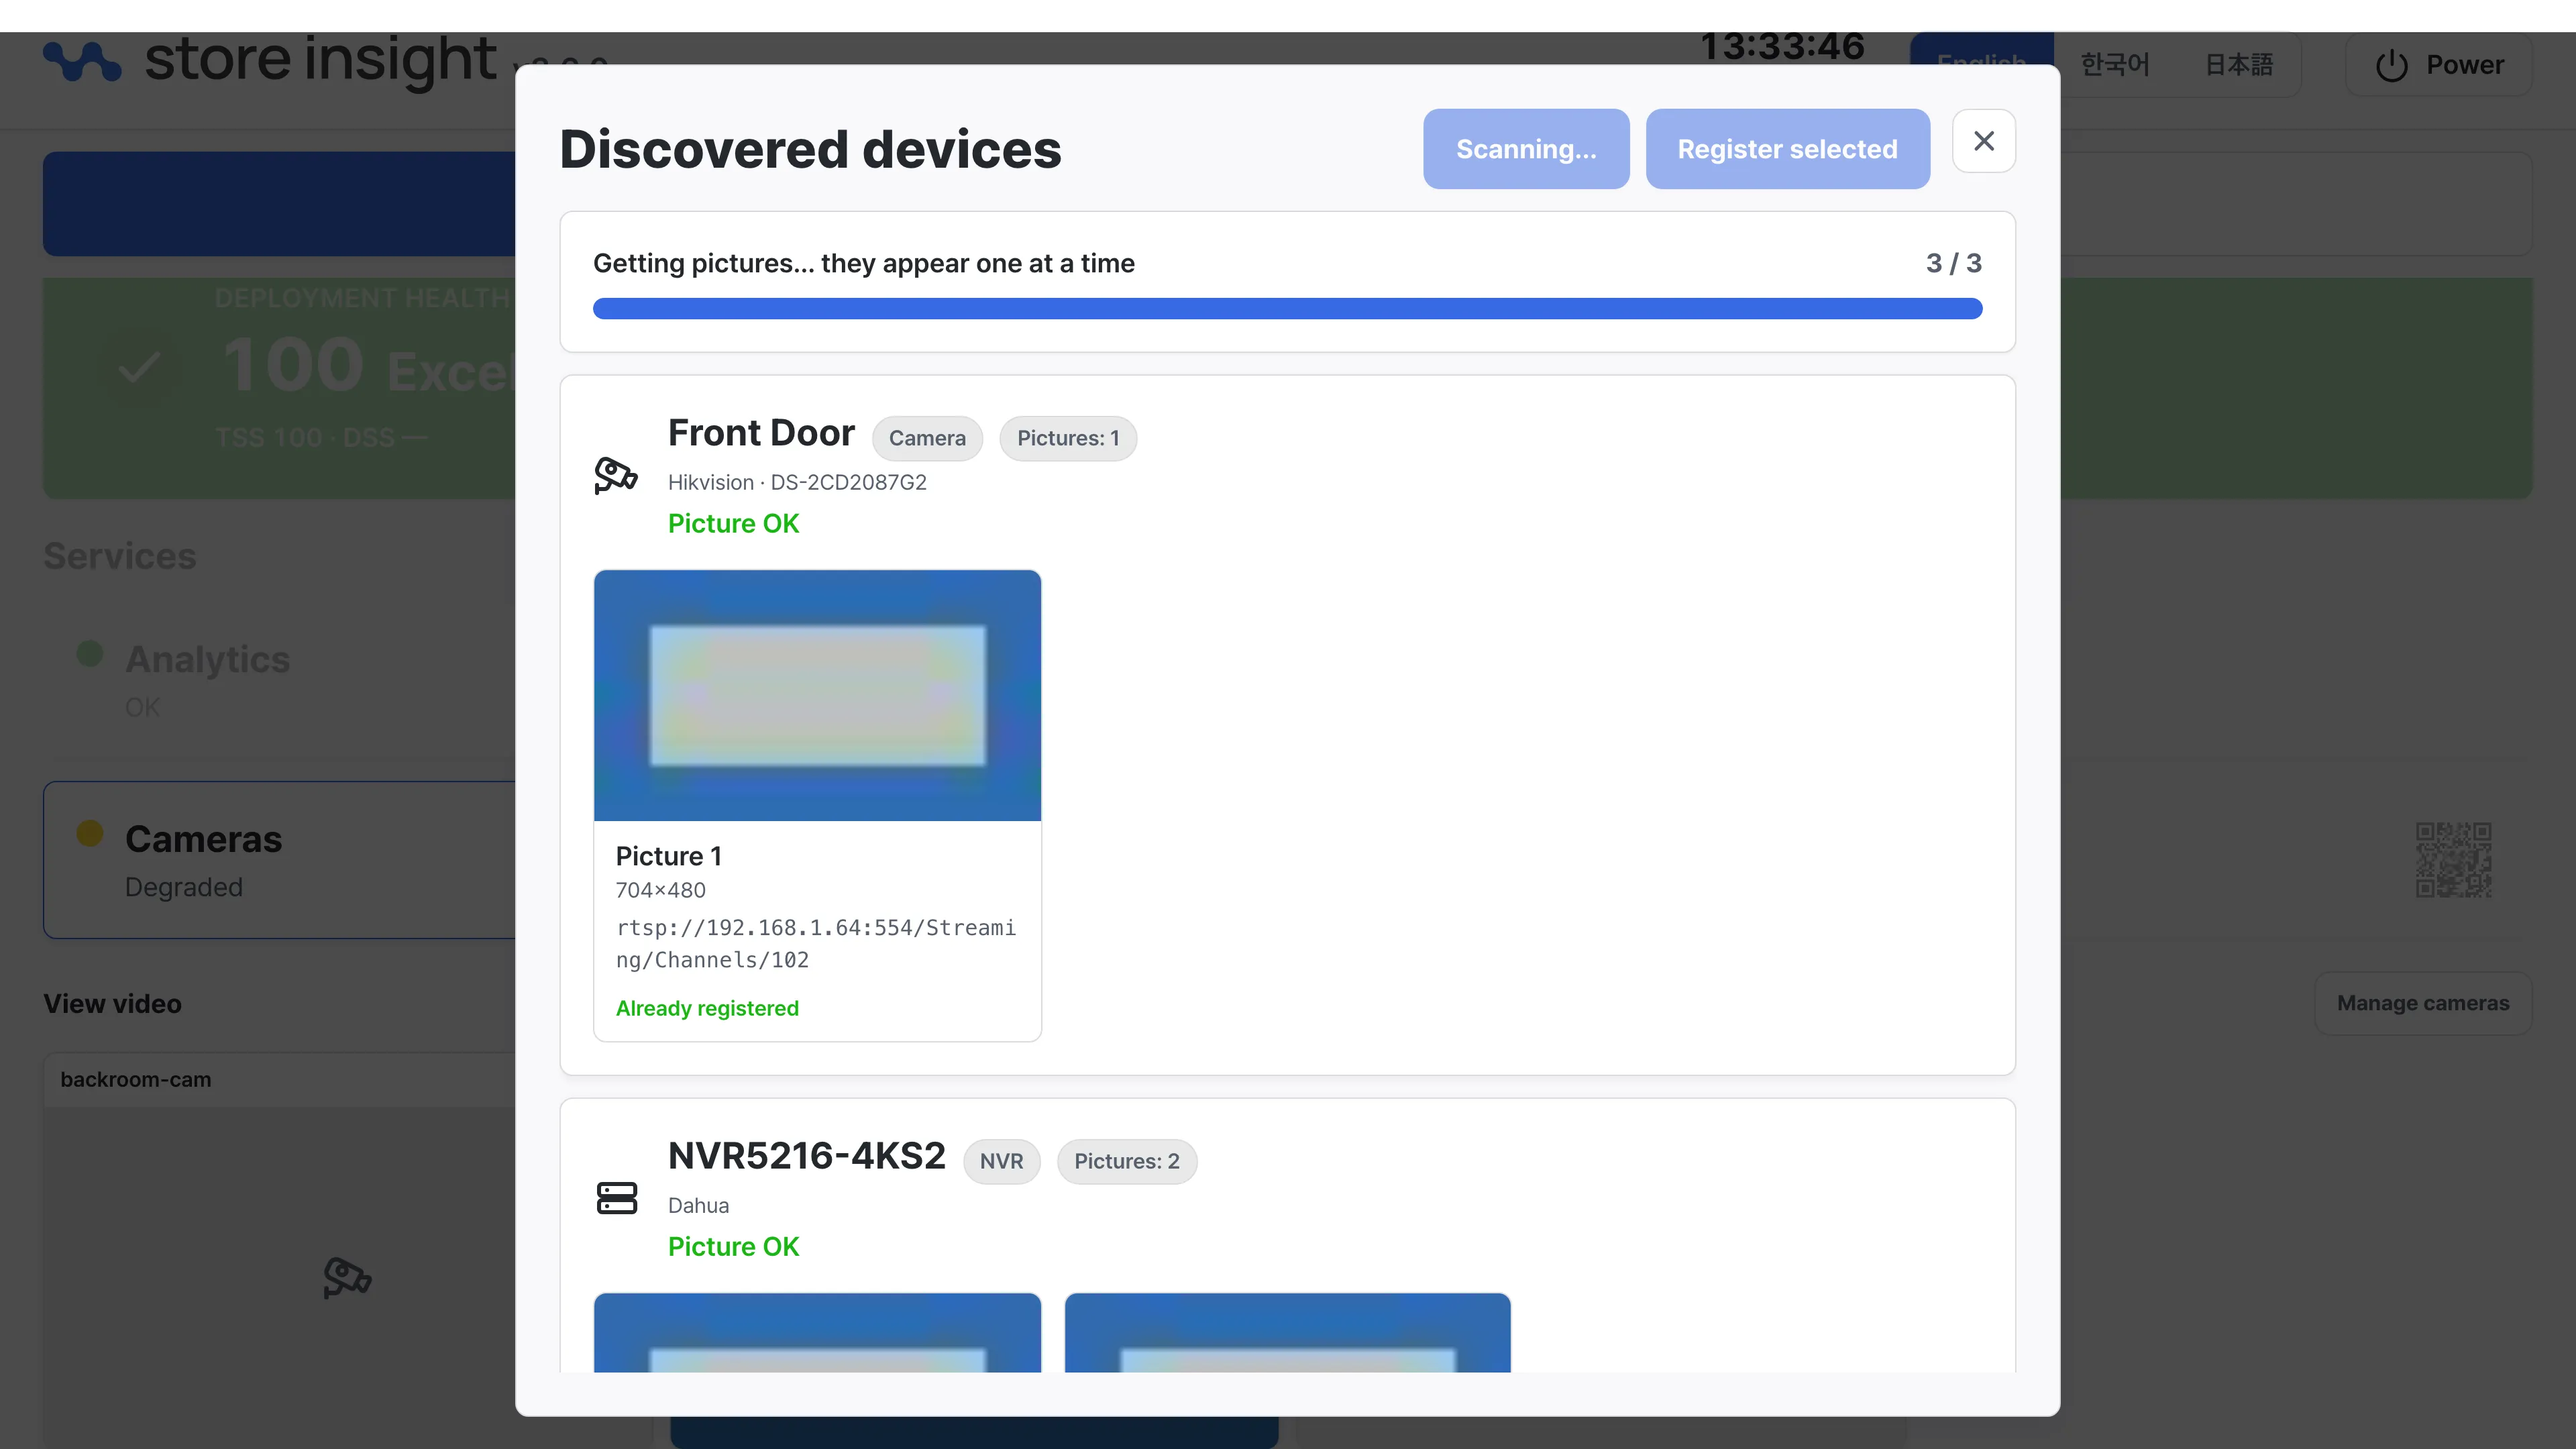
Cameras whose video is confirmed can be registered right there.
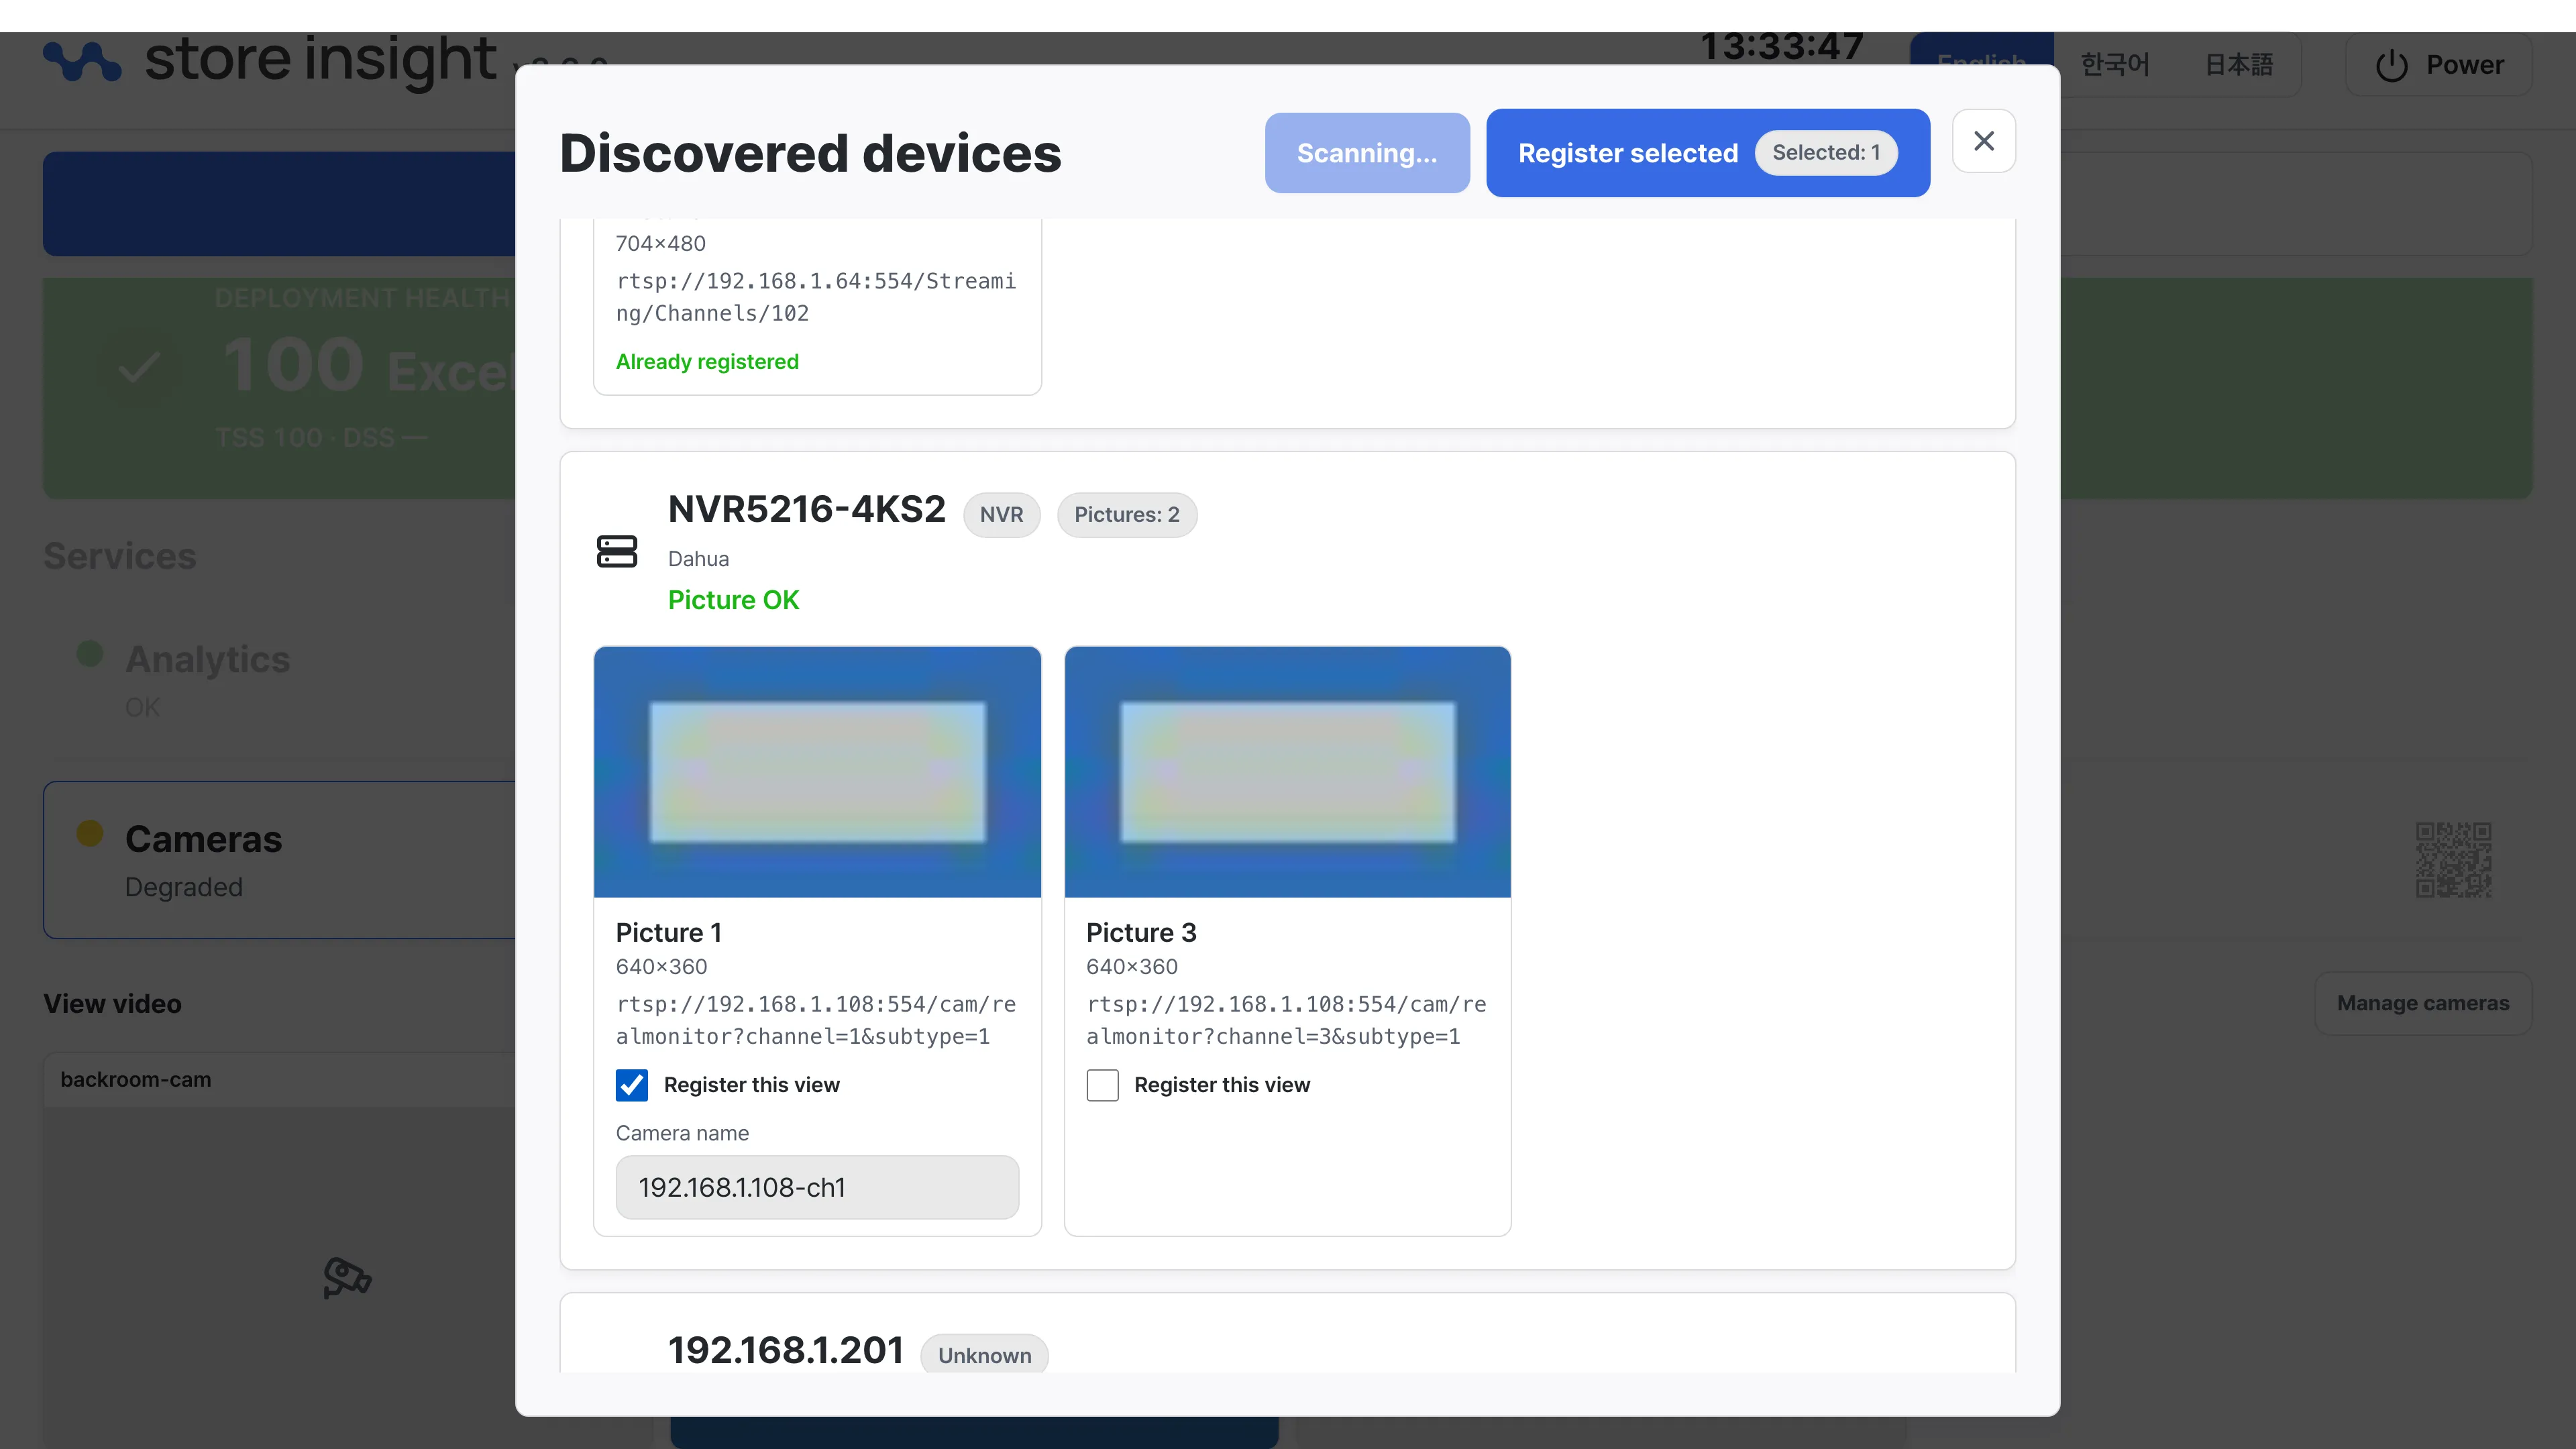
- Check Register this view for the view to register. For an NVR, you can select which views (channels) to register.
- Edit the Camera name to whatever you want.
- Press the Register selected cameras button at the top of the window.
Verifying registration
Once registration is done, the new camera appears immediately in the Camera view list and in the dashboard’s camera settings. Each tile shows the camera name along with an Accessible or Not accessible status, so you can confirm that all registered cameras are receiving video.
For a detailed description of the search and registration controls, see the Manage cameras page. The next step is Set up external access.