

Connect and Configure the Network
Connect the analysis device to the camera and internet equipment with LAN cables, and set the IP for each connection from the On-Site Control Panel Network tab.
Connecting to camera equipment
So the analysis device can receive camera video, connect the camera equipment (cameras, NVRs, or a switch) to the analysis device with a LAN cable.
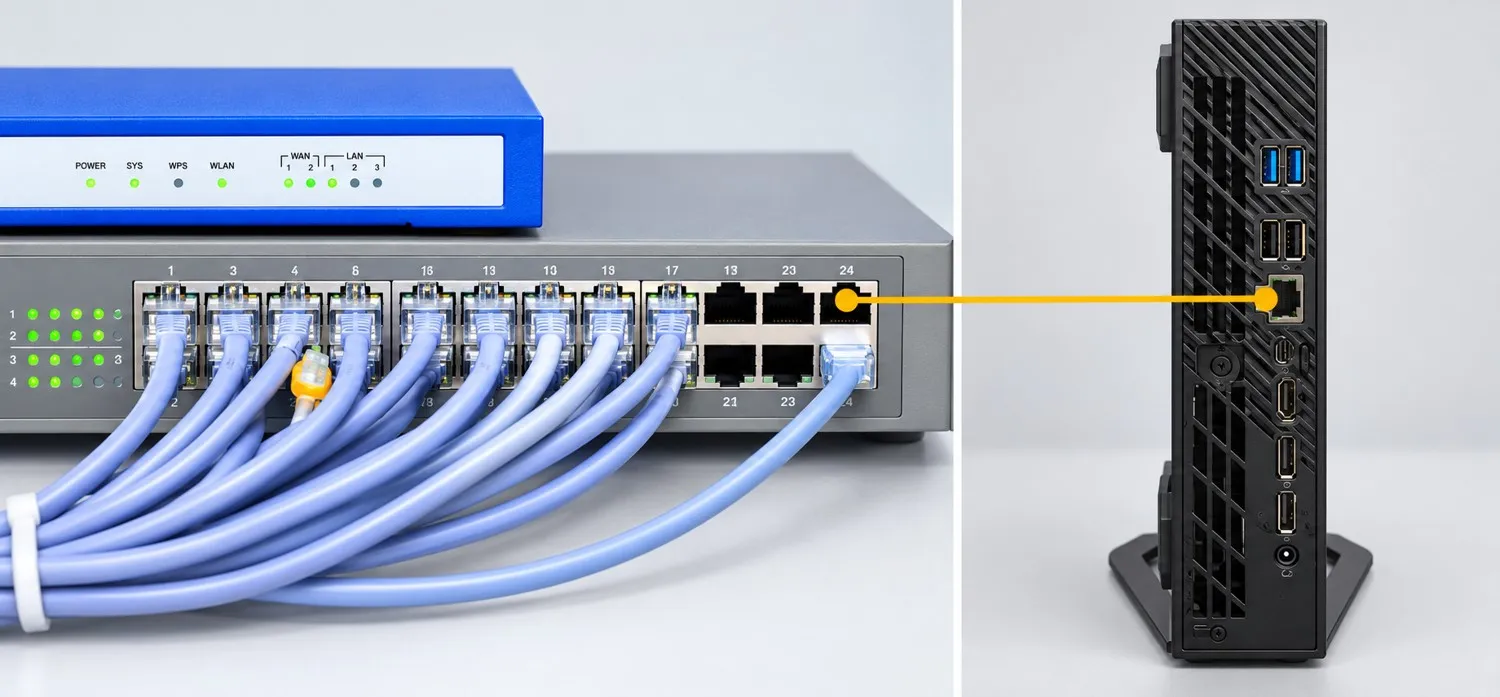
If there are two or more stream networks, plug a USB wired network adapter into the device’s USB port to add connections.
Configuring the stream network
In the On-Site Control Panel Network tab, find the wired connection you just plugged in. When a LAN cable is connected, that connection appears in the list.
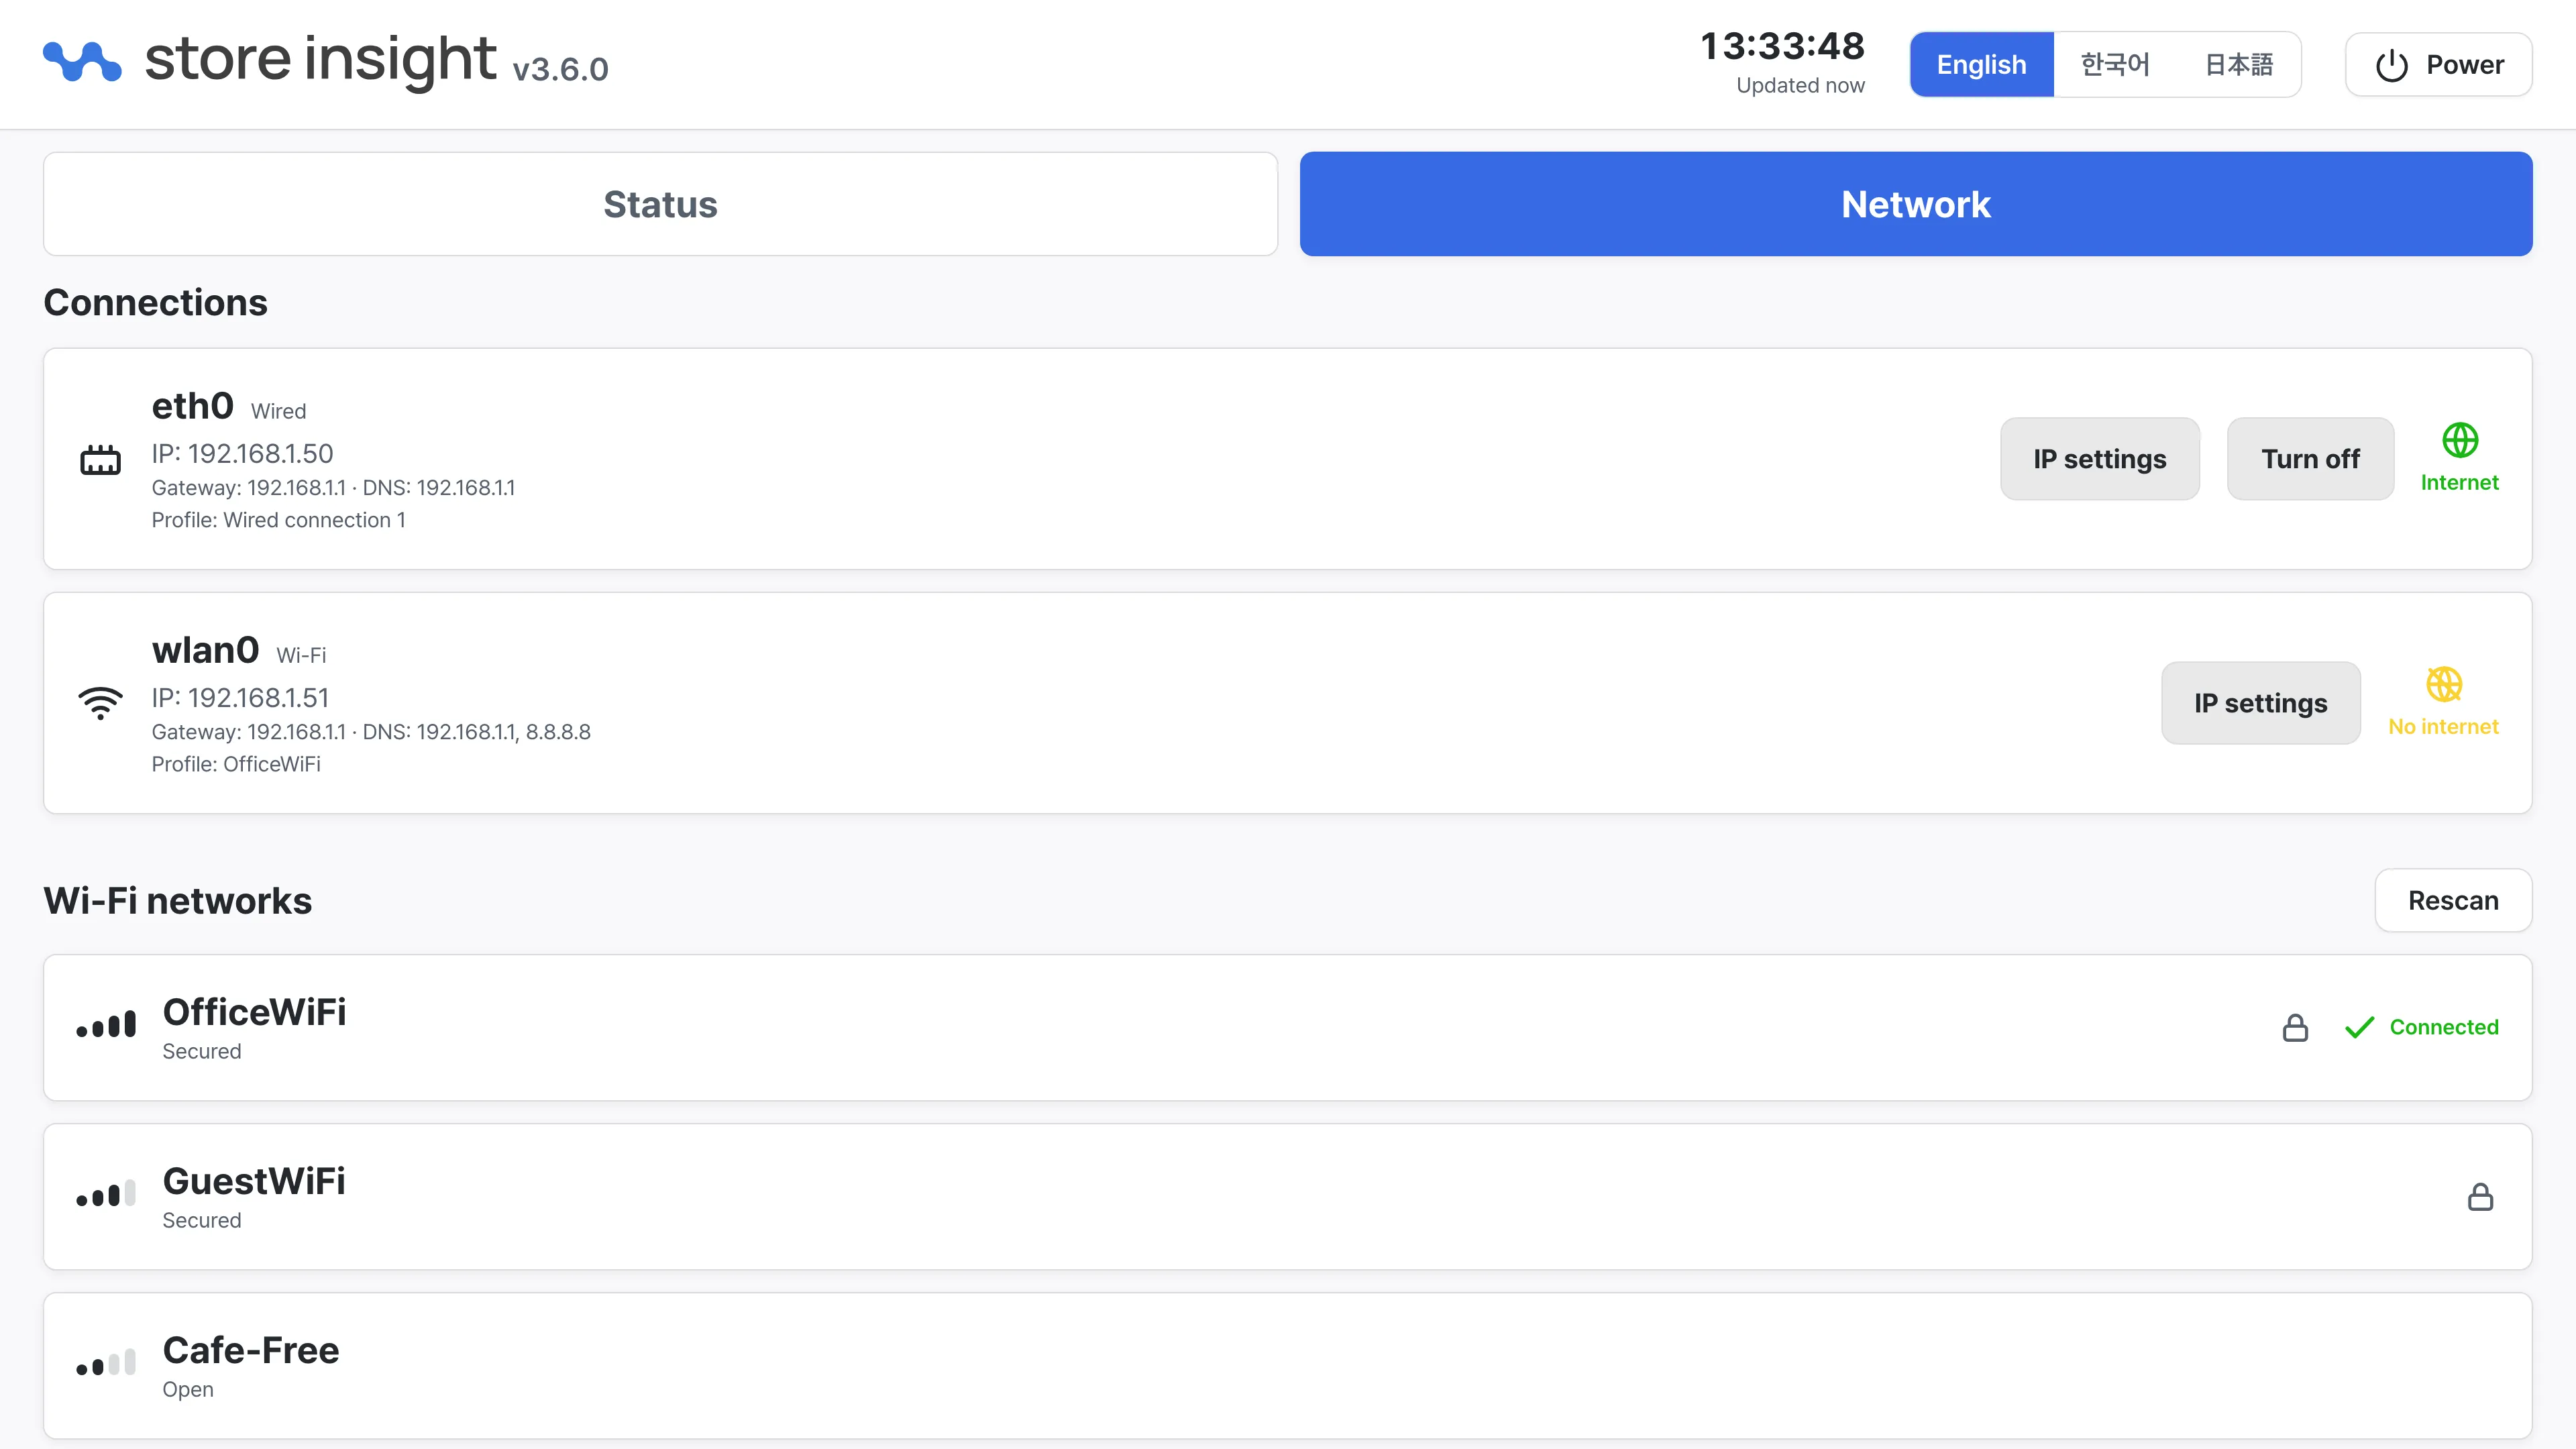
Press the connection’s IP settings button and enter the values for the stream network.
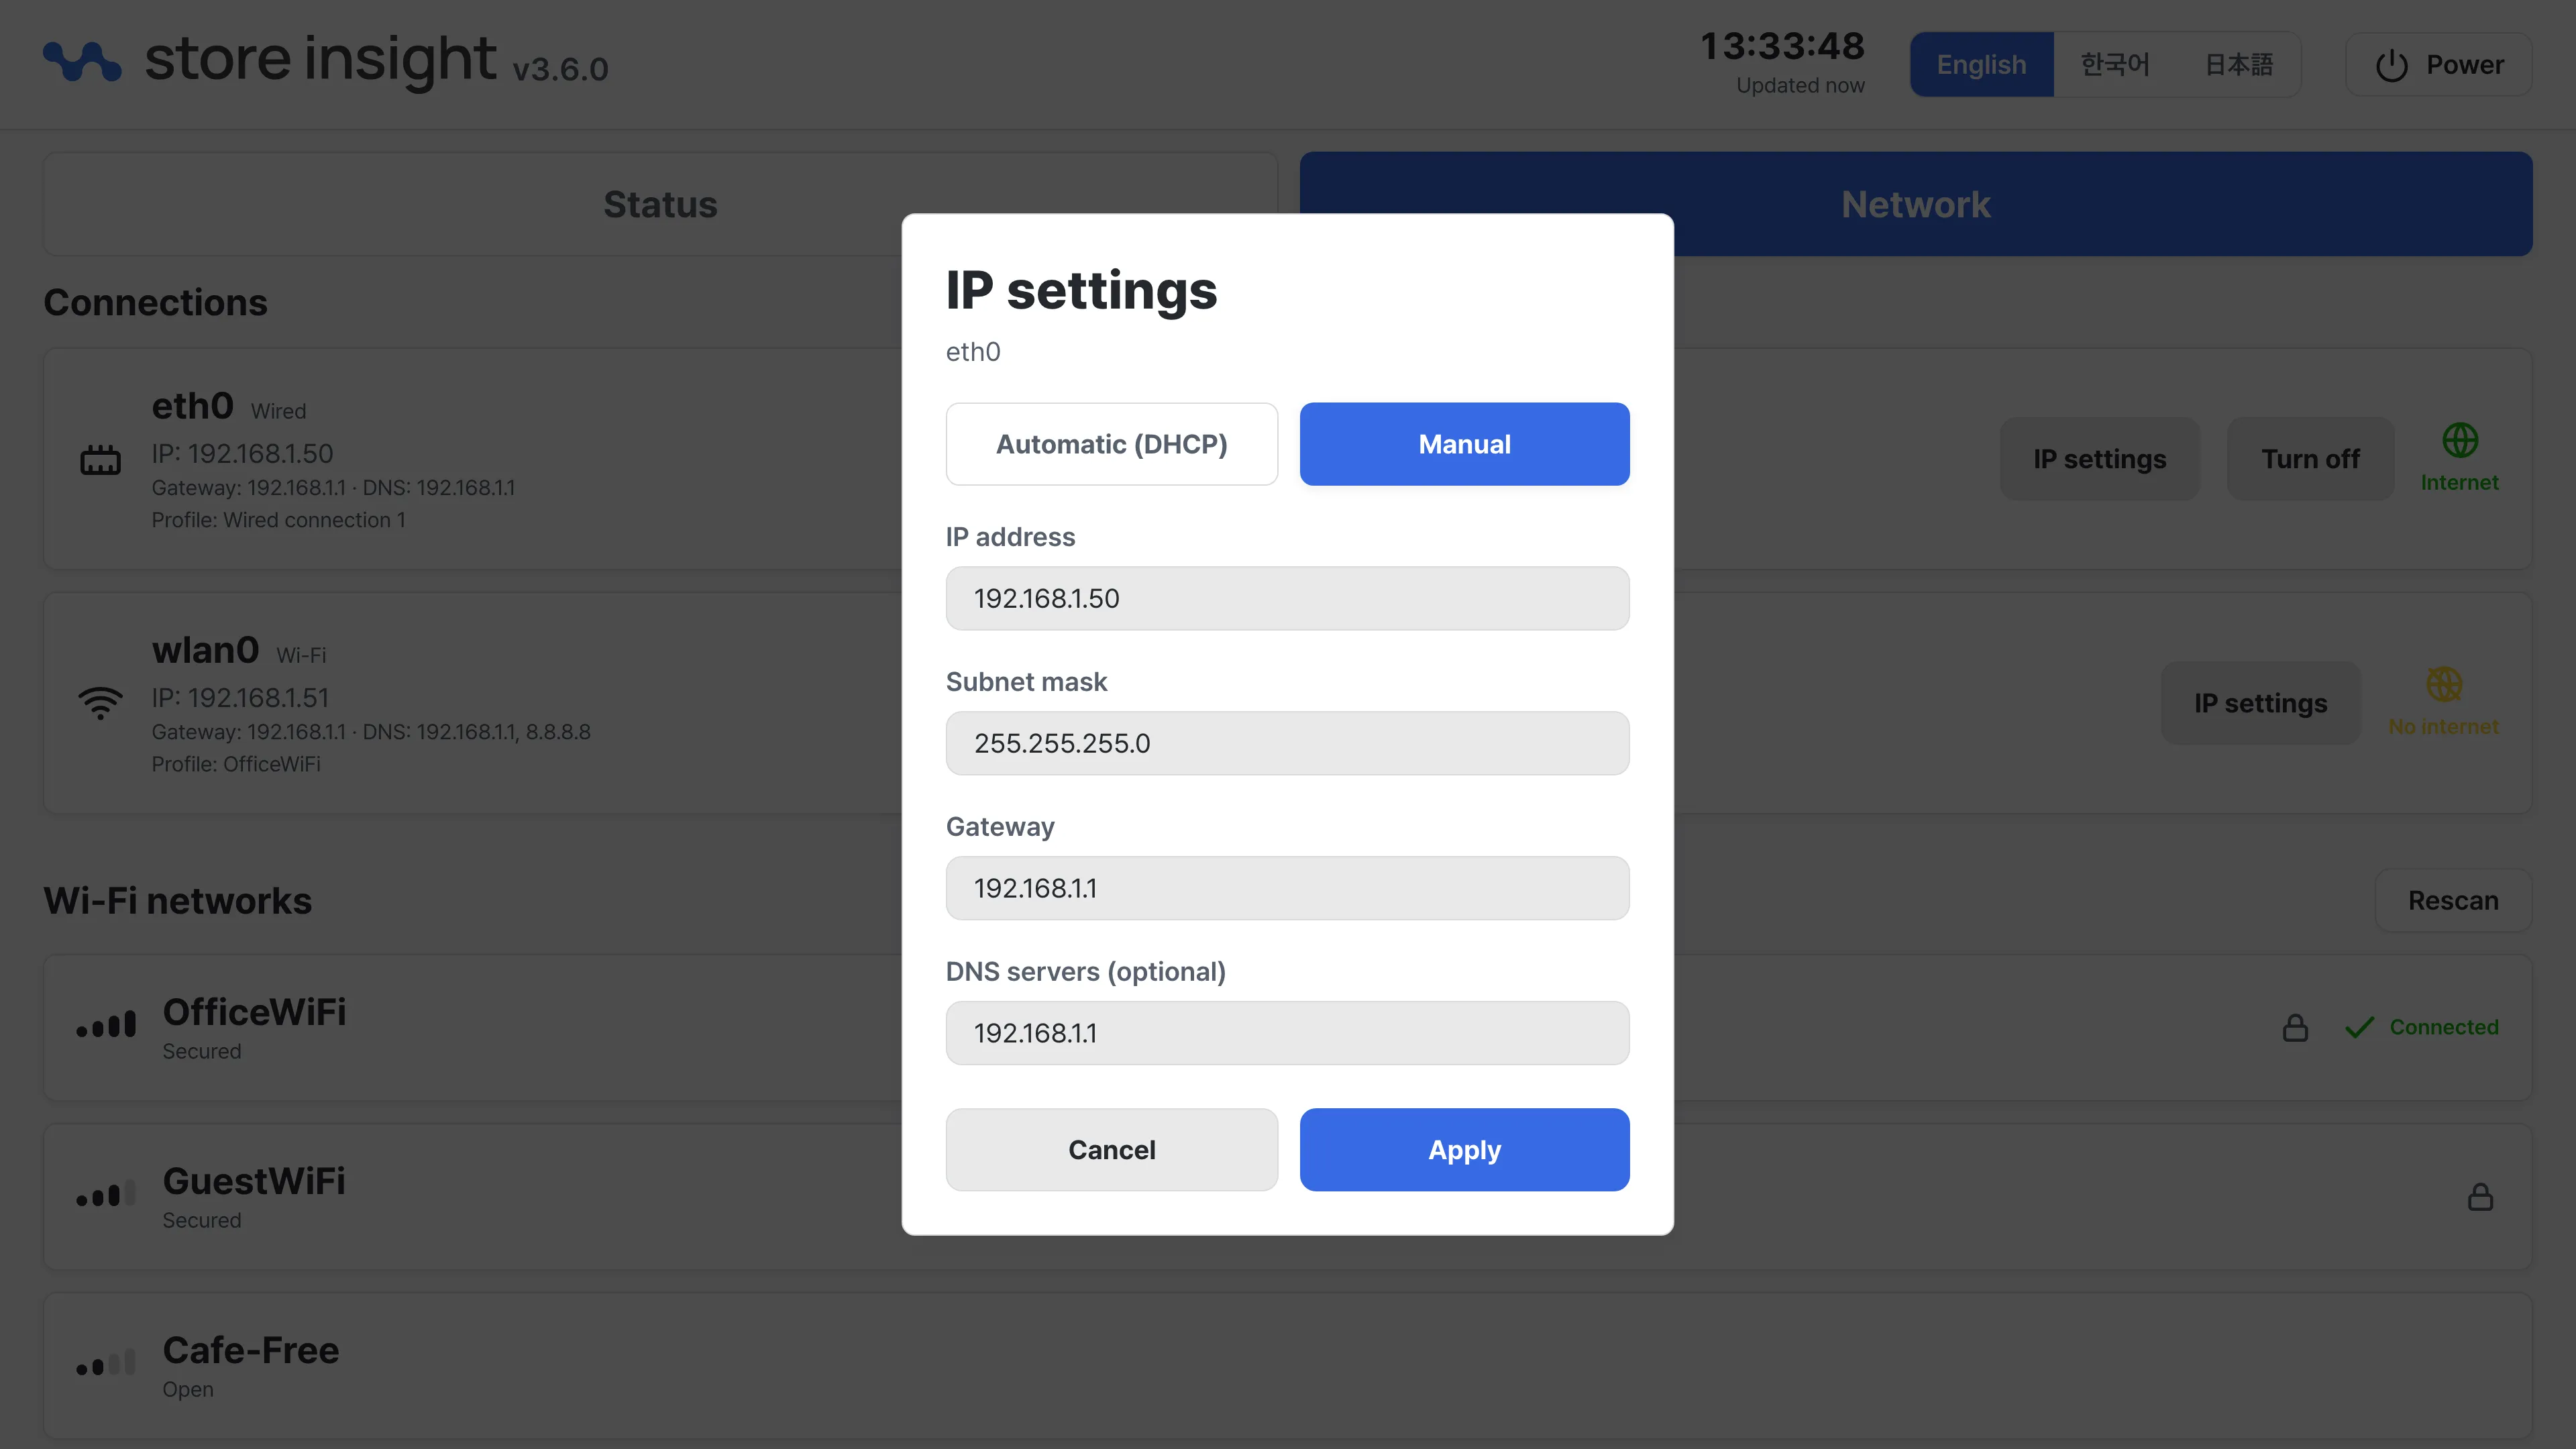
- Automatic (DHCP) — Choose this when the camera-equipment side assigns addresses automatically.
- Manual — Enter Address, Netmask, Gateway, and DNS yourself. If the site information has pre-agreed values, enter them to match the stream network.
Entered values are validated before they are applied, and invalid addresses are not applied. For details, see the Network tab page.
Connecting to internet equipment
So the analysis device can reach the internet, connect the internet equipment (router, VPN device, etc.) to the analysis device with a LAN cable.
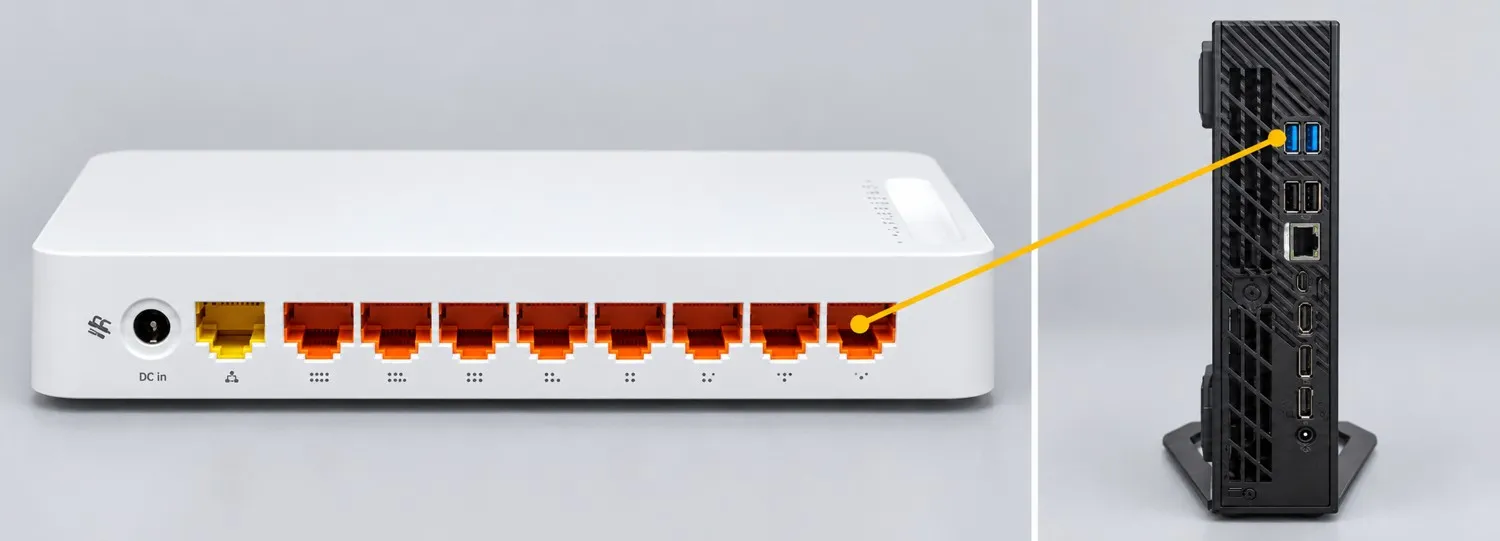
Configuring the internet network
The same way as the stream network, find the wired connection to the internet equipment in the Network tab and open IP settings. Enter the values as Automatic (DHCP) or Manual so the device can reach the internet.
To connect to the internet over the store’s Wi-Fi instead of a wired connection, pick the store network from the Wi-Fi list in the Network tab. For details, see Network tab — Joining a Wi-Fi network.
You can confirm the internet connection is healthy from the Internet card on the Status tab. The next step is Register cameras.