

Camera management
Even without knowing a camera’s address, the On-Site Control Panel can search the store network, show each camera’s picture, and register it into StoreInsight on the spot. When a camera has been newly installed or replaced, the whole hookup can be finished right at the store with no separate setup tool.
Finding cameras
- On the Status tab, tap the Cameras card to open the View video area.
- Tap Manage cameras to open the Discovered devices dialog.
- Tap Find cameras — the Camera login dialog appears.
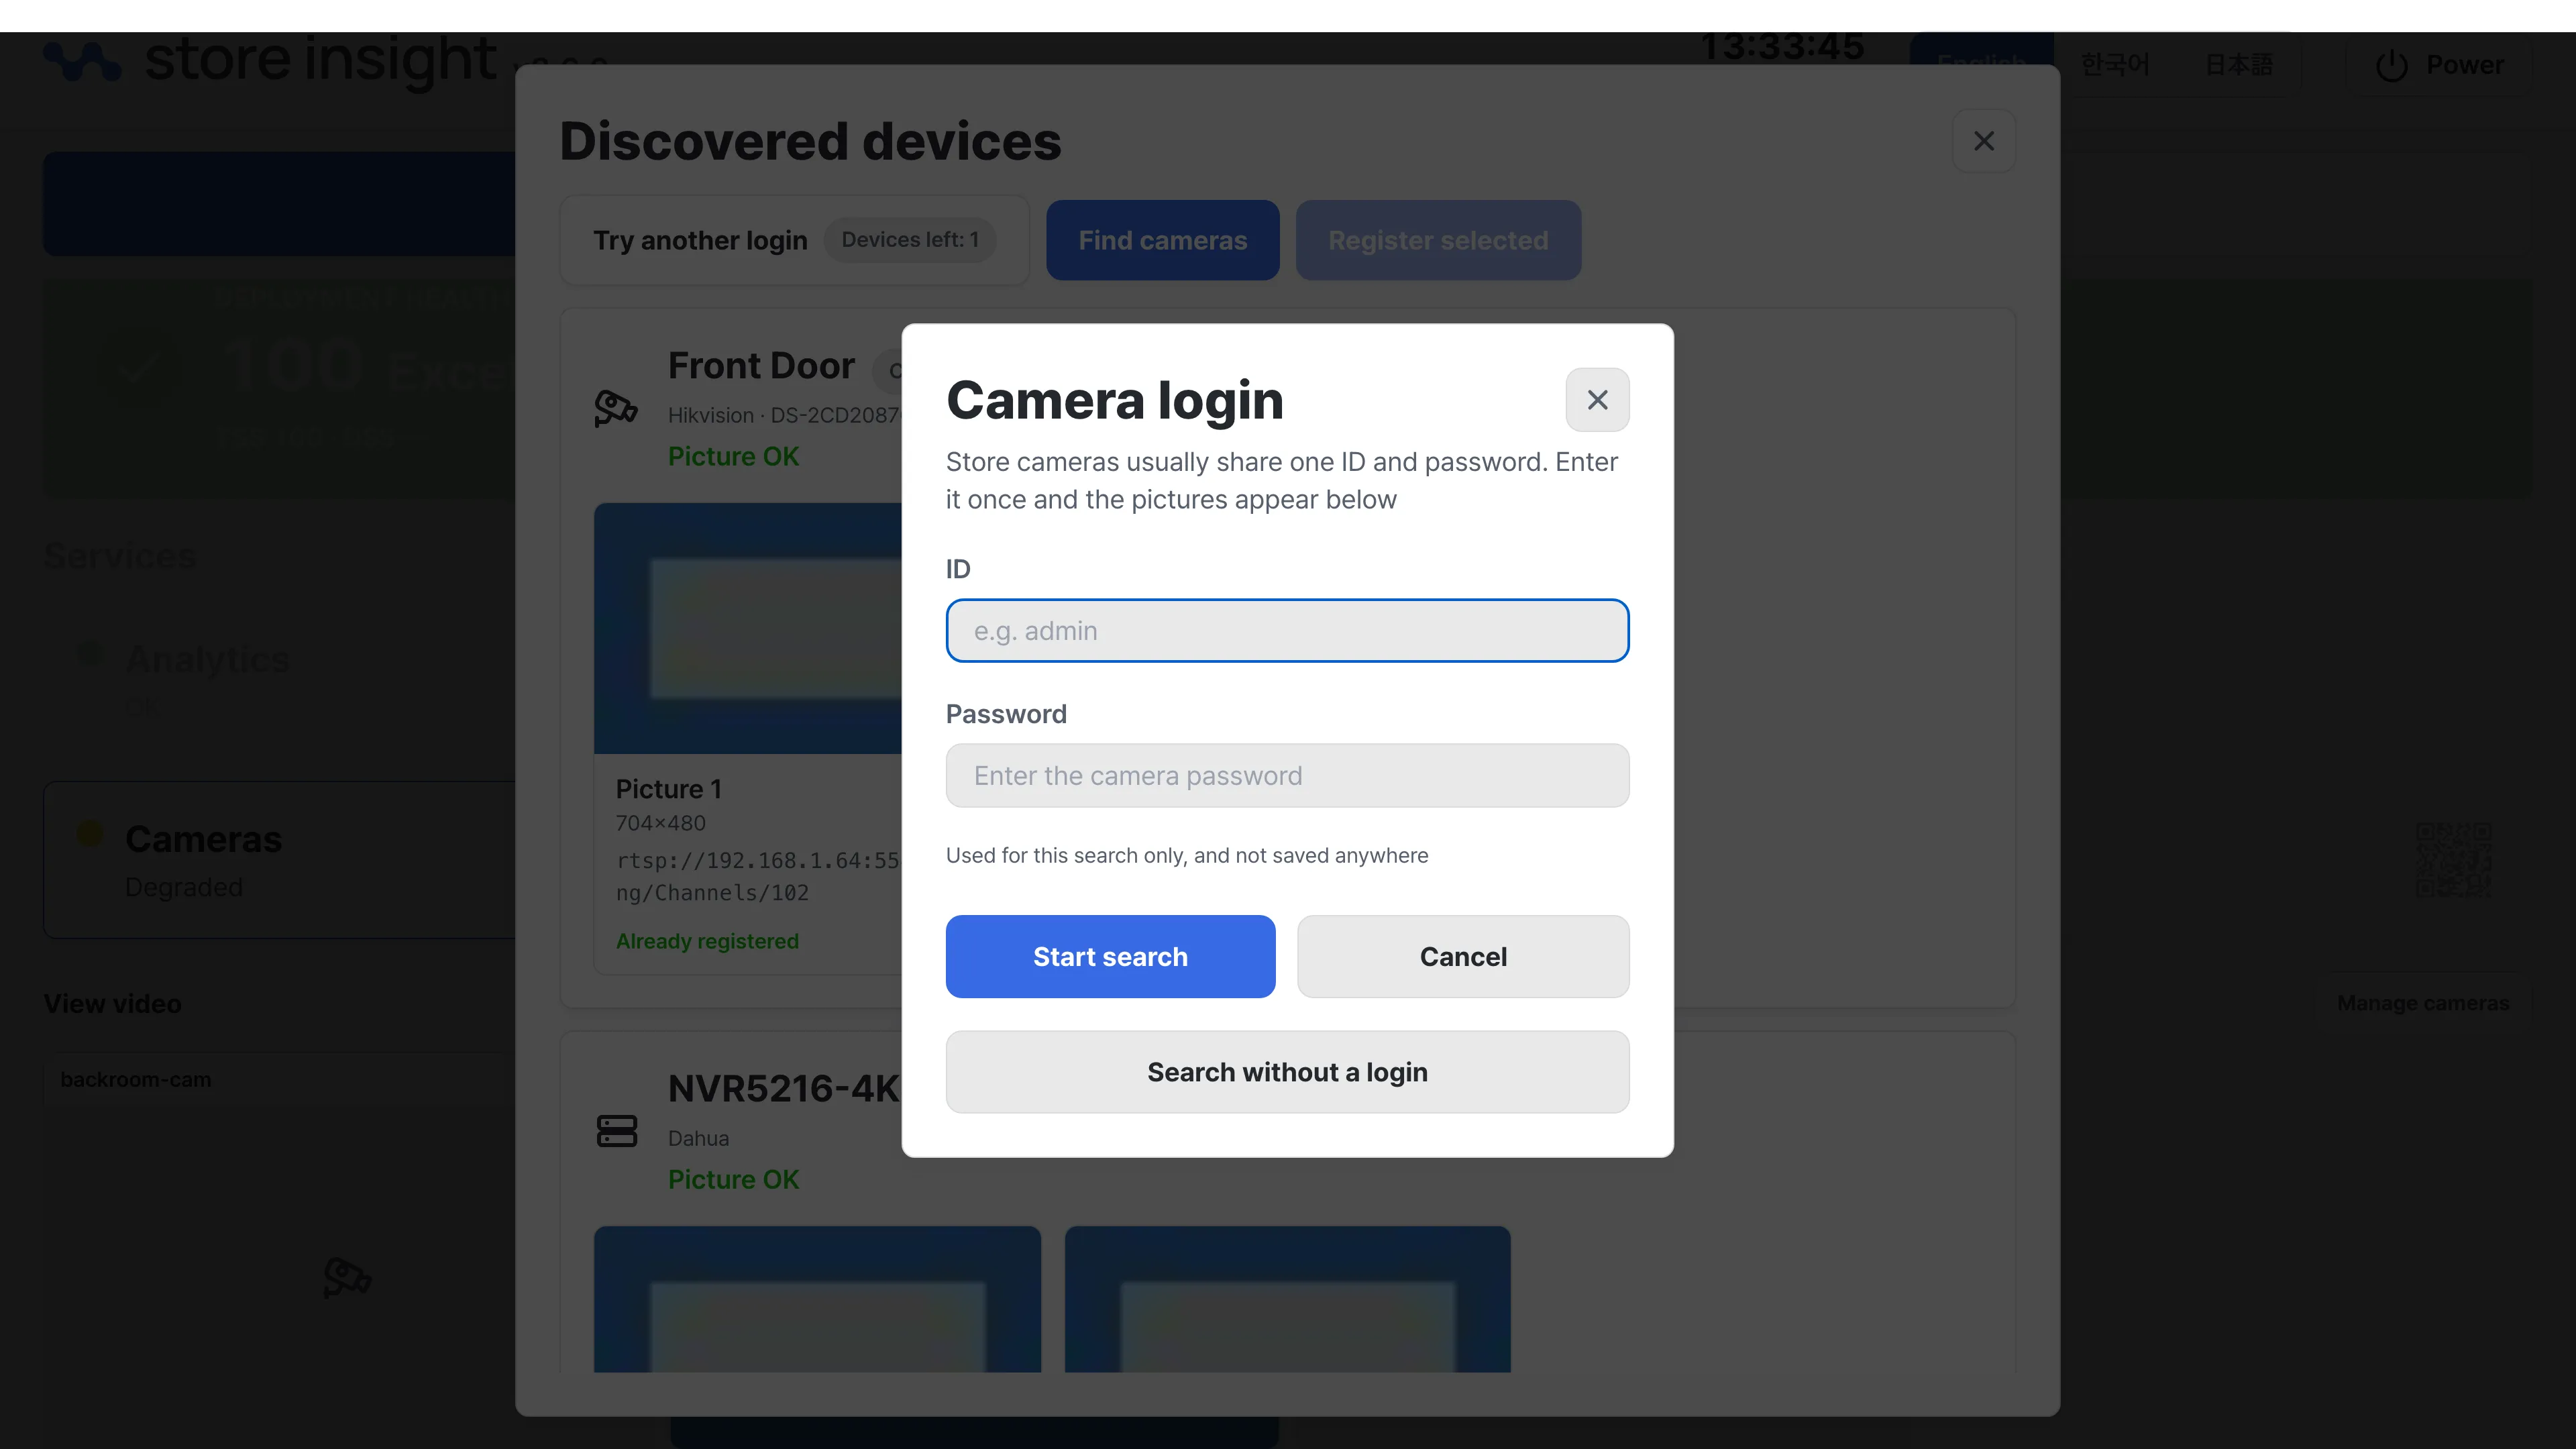
Store cameras usually share one ID and password. Enter it once, and the search fetches pictures from the devices it finds.
- The login is used for this search only, and not saved anywhere.
- If you don’t know the account, Search without a login lists the devices without pictures.
Reading the results
The search sweeps the whole store network, so it can take a few minutes. Devices whose pictures load appear at the top of the list as they succeed — there is no need to wait for the search to finish.
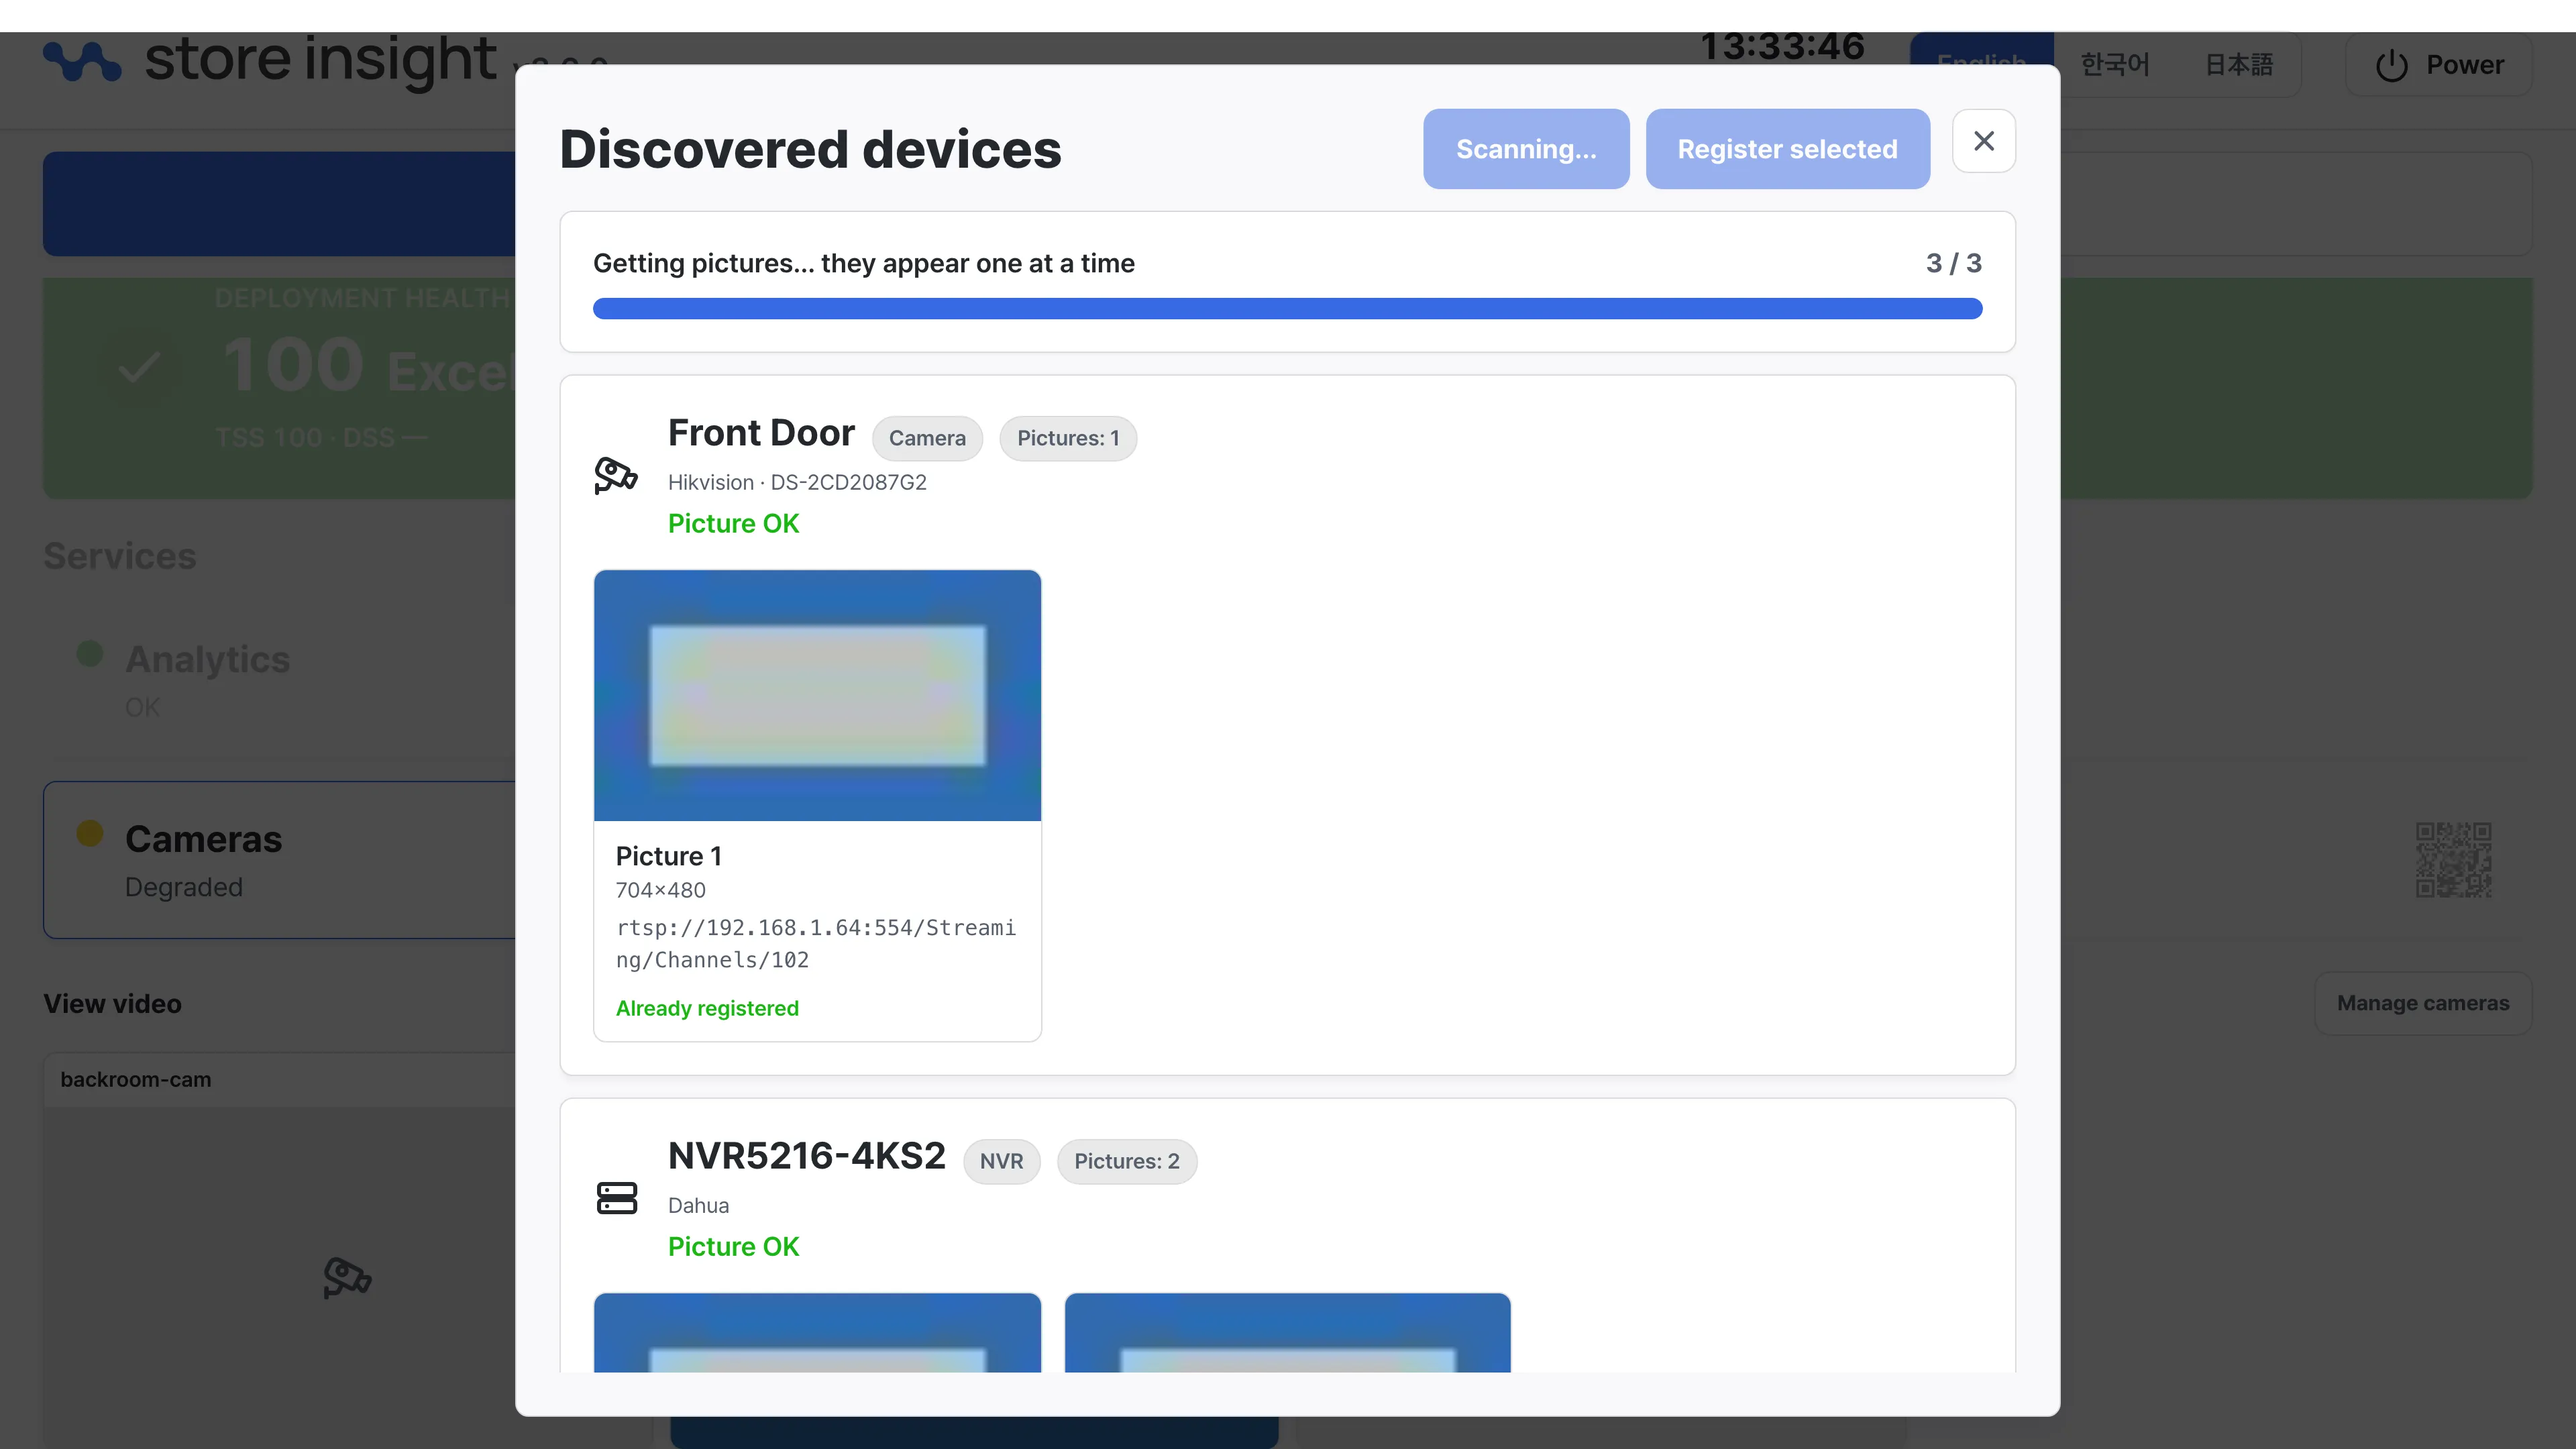
Each device shows:
- Device kind — Camera, NVR (recorder), or Unknown. An NVR can carry several pictures (channels).
- Device state — One of the following, based on what the check found:
- Picture OK — The picture was fetched successfully.
- ID or password was refused — The device needs a different account.
- No answer — The device did not respond.
- No picture from this device — Reachable, but no picture could be opened.
- Picture previews — The actual scene, resolution, and stream address per picture.
If some devices use a different account, Try another login re-checks only the devices that produced no picture. Pictures you already have are kept, so a store with several accounts can be worked through one login at a time.
Registering cameras
A camera whose picture has been verified can be registered into StoreInsight right there.
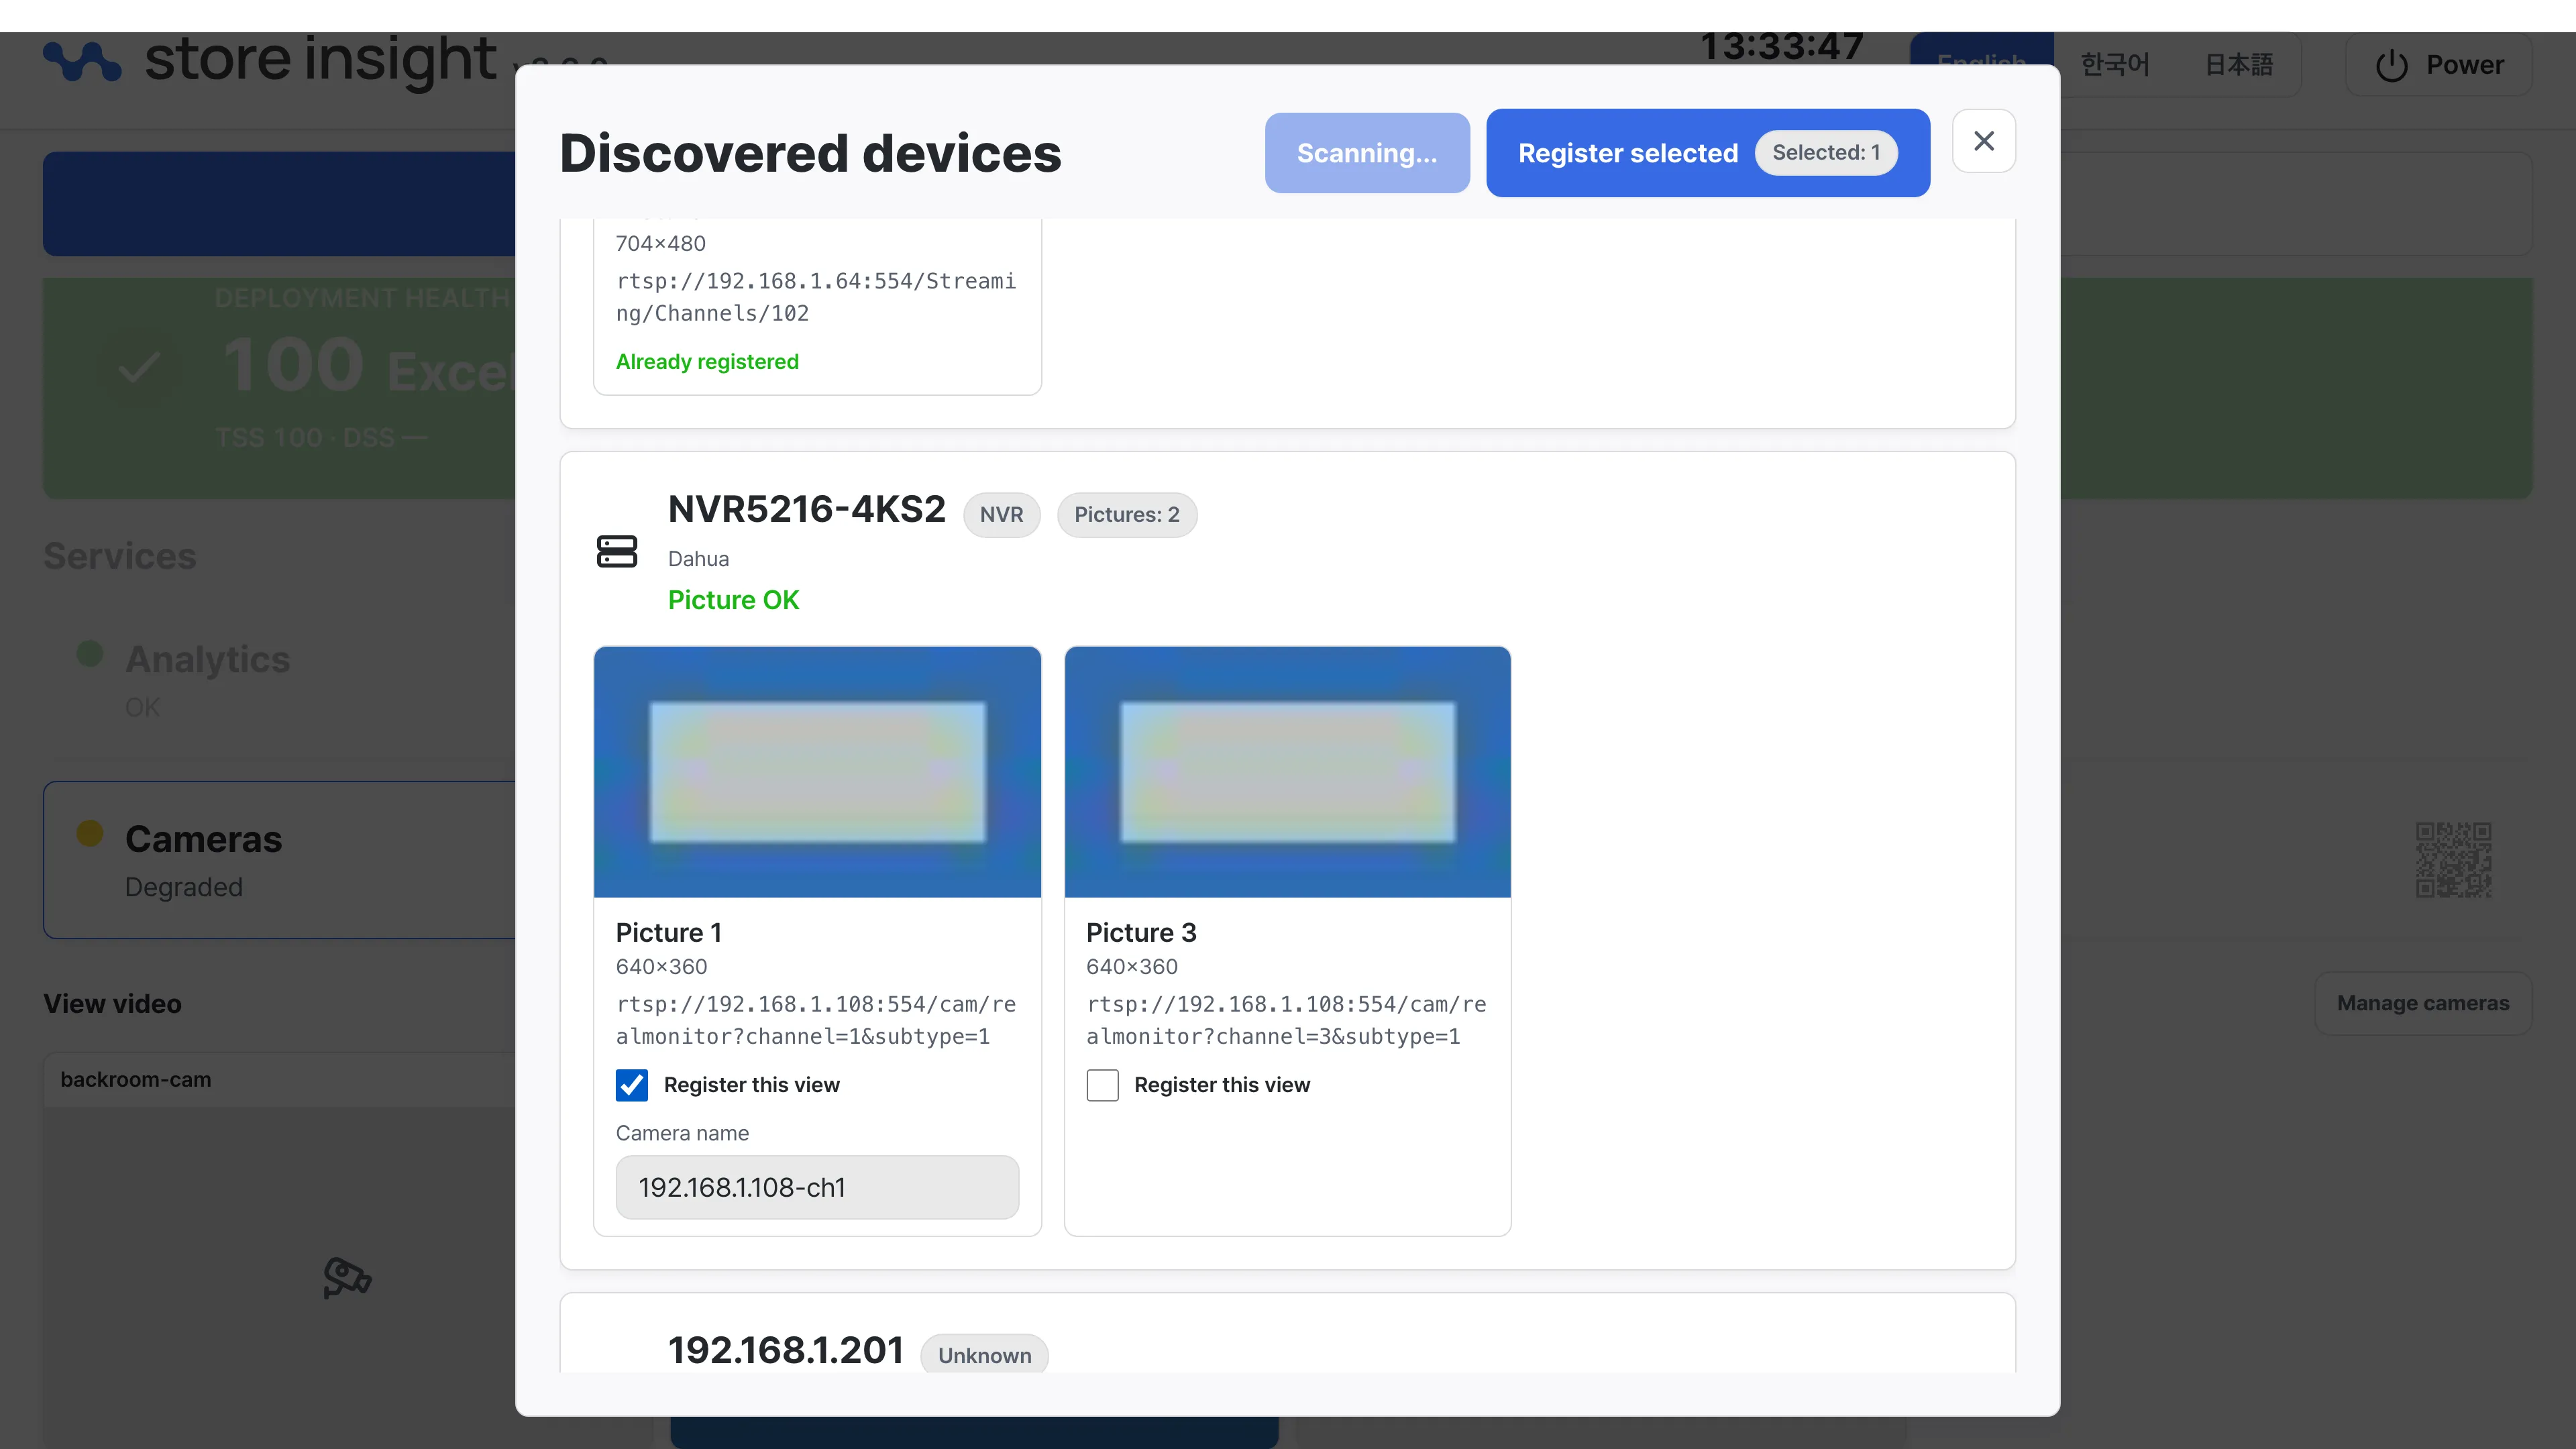
- Tick Register this view on each picture to add. On an NVR you can pick individual views (channels).
- Adjust the Camera name if needed — a default based on the device address and channel number is filled in.
- Tap Register selected at the top of the dialog.
Views that are already registered carry an Already registered badge and cannot be selected again, so the same camera is never registered twice.
Once registration finishes, the new cameras appear immediately in the View video list and in the dashboard’s camera settings. The picture from registration is stored on the tile, so you can tell the cameras apart later.
If registration is unavailable
If the register button is disabled, check the reason shown in the dialog.
- Camera registration is turned off — On-site registration is disabled on this appliance. Contact Deeping Source.
- No PLUSINSIGHT installation found on this appliance — The device needs inspection. Contact Deeping Source.
- The PLUSINSIGHT database is not running — Check the Database card on the Status tab. If it stays down, contact Deeping Source.